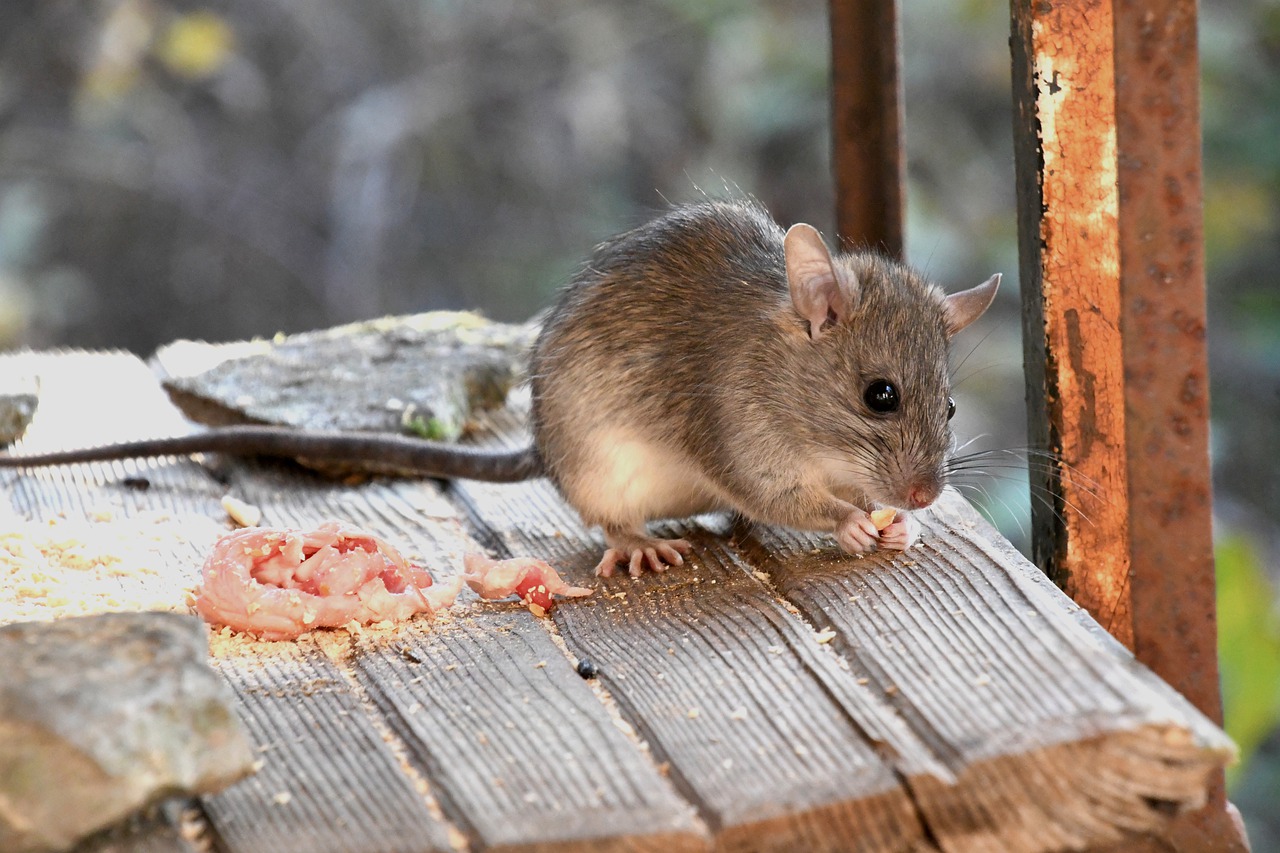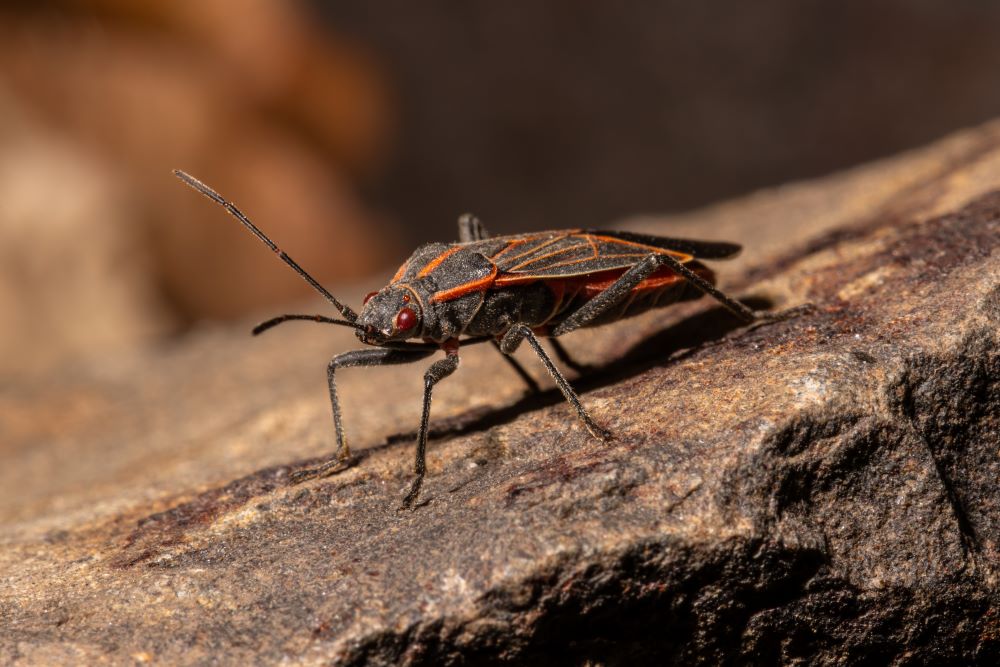
Do Boxelder Bugs Bite? – Pest Fact or Fiction

Do boxelder bugs bite

Have you ever wondered about the truth behind the behavior of boxelder bugs, and do boxelder bugs bite? Despite their prominent presence, especially on warm building exteriors during fall, boxelder bugs (Boisea trivittata) maintain a reputation for being non-aggressive insects that do not bite humans or animals.

Armed with the expertise of Recon Pest Services, this article dives deep into the habits of these strikingly marked insects, addressing the persistent question: Do boxelder bugs bite? We’ll also outline effective prevention and control methods to keep your space free from these unwelcome guests, ensuring your peace of mind.

Understanding Boxelder Bugs Behavior

Boxelder bugs are more of a nuisance than a threat, as they do not transmit diseases or cause significant structural damage to homes. Nonetheless, they can be bothersome due to the potential staining from their feces on light-colored surfaces and the visual discomfort of large numbers congregating in living spaces. Understanding their life cycle is crucial for managing their presence effectively. These bugs undergo incomplete metamorphosis, with three life stages: egg, nymph, and adult. You’ll notice two generations annually, with adults seeking shelter to overwinter as the cold sets in.

Prevention and control methods for these insects should focus on deterring home invasion since they cause minimal damage to landscape plants. Sealing entry points, maintaining cleanliness, and reducing outdoor hiding places are practical steps. While they may be attracted to buildings with significant southern or western exposure, especially during fall, remember that physical removal is the most practical control method once indoors. Chemical treatments are rarely necessary; instead, simple measures like vacuuming and washing with water are often sufficient to manage these seasonal visitors.

Do Boxelder Bugs Bite?

While it’s a common concern, instances of boxelder bugs biting humans are quite rare. However, it’s not outside the realm of possibility, especially if these bugs feel threatened. Here’s what you need to know about the potential of a boxelder bug bite:

  • Defensive Bites: On the off chance that you find yourself on the receiving end of a boxelder bug bite, it’s likely a defensive action rather than an aggressive one.
  • Symptoms: If a bite does occur, you might experience:
    • Redness and swelling at the bite site
    • Itching or pain
    • A small rash that’s generally mild and resolves on its own
  • Severity: Thankfully, severe reactions to boxelder bug bites are exceedingly rare.

    Remember, these bugs are more interested in the seeds of boxelder trees than in biting you. In the unlikely event that you’re bitten, the discomfort should be minimal, causing only minor redness and irritation. If you handle these bugs, be gentle to avoid any defensive nipping. Your peace of mind is our priority, and while can boxelder bugs bite, knowing they are not aggressive biters should ease any concerns.

Tips for Box Elder Bug Control

If you want to keep these boxy biting brutes away from your homeHere’s how you can keep boxelder bugs at bay:

Proactively Preventing Box Elder Bug Infestations:

  1. Check and repair any holes in window and door screens to block entry points.
  2. Seal cracks and crevices around your home’s exterior using caulk for a bug-proof barrier.
  3. Install door sweeps to deter bugs from crawling underneath.

    Control Tips:
  • Vacuuming: An immediate solution to remove visible boxelder bugs from your home.
  • Washing: Use soapy water to clean surfaces where bugs congregate; this also helps to remove any lingering odors.
  • Debris Removal: Keep the area around your home’s foundation clear of seedpods and overgrowth to discourage bug gatherings.

    Professional Intervention:
  • If you suspect a significant infestation, it’s wise to contact a licensed pest control professional. They can provide tailored solutions, ensuring your peace of mind is intact.

    Remember, while the thought “Can boxelder bugs bite?” may cause concern, these prevention and control methods will minimize any potential encounters, allowing you to maintain a bug-free environment.

Conclusion – Do Boxelder Bugs Bite?


Should the need arise for professional assistance, Recon Pest Services is equipped to restore tranquility to your home in Omaha & Lincoln, ensuring a bug-free sanctuary. With this assurance, boxelder bugs can be relegated to a distant thought, allowing homeowners to relish the sanctity of their living spaces without concern or discomfort.

Recon CTAs 1200x200 General

Gopher Holes 101: Understanding Burrowing Rodents

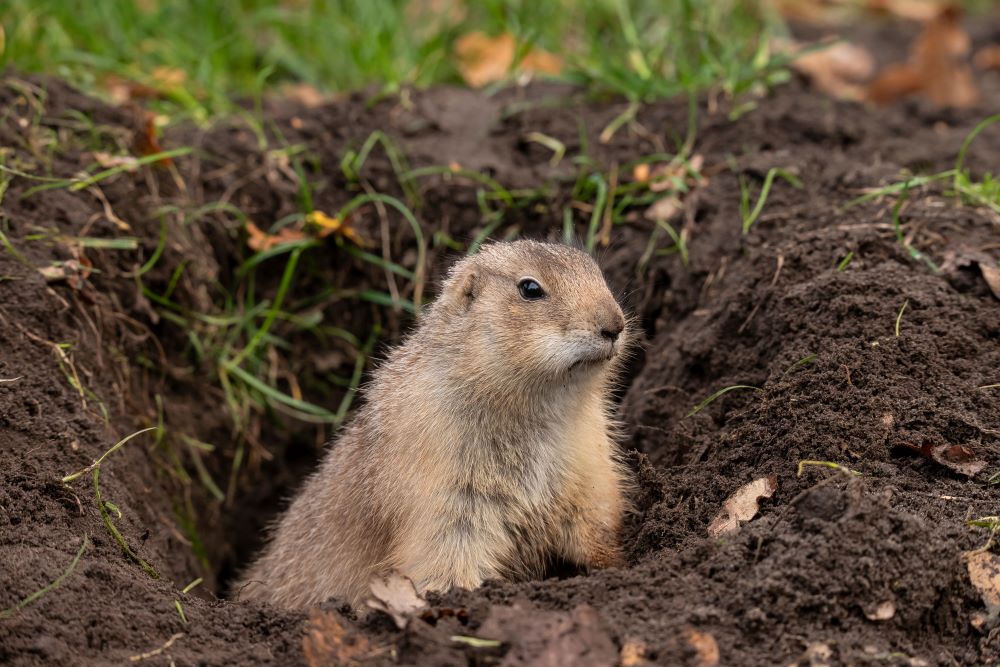
Gopher holes

Gophers are fascinating creatures that have managed to capture the curiosity of both nature enthusiasts and homeowners alike. With their ability to create elaborate burrow systems, gophers have become notorious for their impact on landscapes and gardens. Understanding the secret world of gopher holes is crucial in order to effectively manage and control these burrowing rodents.

The importance of understanding gopher holes

Gopher holes may seem like a minor inconvenience, but they can have significant consequences for both residential and commercial properties. The intricate tunnels created by gophers can undermine the structural integrity of buildings, sidewalks, and even roadways. This can lead to costly repairs and potential safety hazards. By gaining a deeper understanding of gopher holes, homeowners and property managers can take proactive measures to prevent and manage these burrows.

How gophers create their burrows

Gophers are master excavators, capable of creating complex underground networks that extend for several meters. These burrows serve as their homes, providing protection from predators and adverse weather conditions. Gophers use their powerful front legs and sharp claws to dig through soil, creating tunnels and chambers. As they dig, they push the soil to the surface, creating mounds that are a telltale sign of gopher activity. It is fascinating to note that a single gopher can create an extensive network of burrows, with multiple entrances and exits.

The anatomy of a gopher hole

A typical gopher hole consists of several components that work together to create a functional living space for these rodents. The entrance hole is typically surrounded by a mound of loose soil, which serves as a protective barrier against predators. From the entrance hole, a main tunnel leads to a central chamber, where the gopher resides. This chamber is where the gopher rests, stores food, and raises its young. From the central chamber, secondary tunnels branch out, connecting to feeding areas and additional chambers. These secondary tunnels can extend several feet from the main tunnel, creating a complex network of burrows.

Signs of gopher activity and how to identify their burrows

Identifying gopher activity and their burrows is crucial in order to effectively manage and control these rodents. The most obvious sign of gopher activity is the presence of fresh mounds of soil, often accompanied by a visible hole. These mounds are created as the gopher pushes soil to the surface while excavating its burrow. Additionally, gophers will leave behind distinctive gnaw marks on vegetation, such as trees and shrubs. By closely inspecting these signs, homeowners can determine the extent of gopher activity and take appropriate measures to address the issue.

The impact of gopher holes on landscapes and gardens

Gopher holes can have a significant impact on landscapes and gardens. The extensive burrow systems created by gophers can damage plant roots, leading to the death of vegetation. This can be particularly devastating for farmers and gardeners who rely on their crops for sustenance or income. Additionally, the mounds of loose soil created by gophers can be unsightly and pose a tripping hazard. Understanding the impact of gopher holes is essential in order to protect and preserve the beauty and functionality of outdoor spaces.

Methods for preventing and managing gopher holes

There are several methods available for preventing and managing gopher holes. One effective approach is to create physical barriers around vulnerable areas, such as gardens or flower beds. These barriers can be made from materials like wire mesh or hardware cloth, which prevent gophers from accessing the area. Another method is the use of sonic devices that emit high-frequency sounds, which are unpleasant to gophers and deter them from burrowing. Additionally, trapping and removal techniques can be employed to physically remove gophers from the property.

Natural and humane ways to remove gophers and fill their burrows

For those who prefer natural and humane methods, there are alternatives to traditional trapping and removal techniques. One option is the use of castor oil-based repellents, which create an unpleasant taste and smell for gophers, deterring them from the area. Another natural approach is the introduction of predators, such as barn owls or snakes, which feed on gophers. This can help control the population and reduce gopher activity. Once the gophers have been removed, it is important to fill their burrows to prevent other rodents from taking their place. This can be done using soil or other materials that are compacted to ensure stability.

The role of professionals in gopher hole control

While there are many DIY methods for gopher hole control, sometimes it is best to seek the assistance of professionals. Pest control experts have the knowledge and experience to effectively manage and control gopher infestations. They are equipped with specialized tools and techniques that can ensure the complete eradication of gophers from the property. By enlisting the help of professionals, homeowners and property managers can have peace of mind knowing their gopher problem is being handled by experts.

Conclusion

Gopher holes may seem like a small inconvenience, but they can have a significant impact on landscapes and gardens. Understanding the secret world of gopher holes is crucial in order to effectively manage and control these burrowing rodents. By recognizing the signs of gopher activity, implementing preventive measures, and seeking professional assistance when needed, homeowners and property managers can protect their yards and ensure the safety and functionality of their outdoor spaces. Reach out to Recon Pest Services today to get started on effective gopher control and protect your yard!

Can LED Lights Attract Silverfish? Find Out the Truth

Can LED Lights Attract Silverfish?

Introduction to Silverfish and LED Lights

You’ve probably noticed the eerie, silvery creatures that dart around your home at night. They’re called silverfish, and they’ve sparked a lot of debate recently, particularly in relation to LED lights. But what exactly are silverfish? And can LED lights attract silverfish? In this blog post, we’ll delve into these intricate questions and provide you with a comprehensive understanding of these peculiar creatures and their association with LED lights.

What are Silverfish?

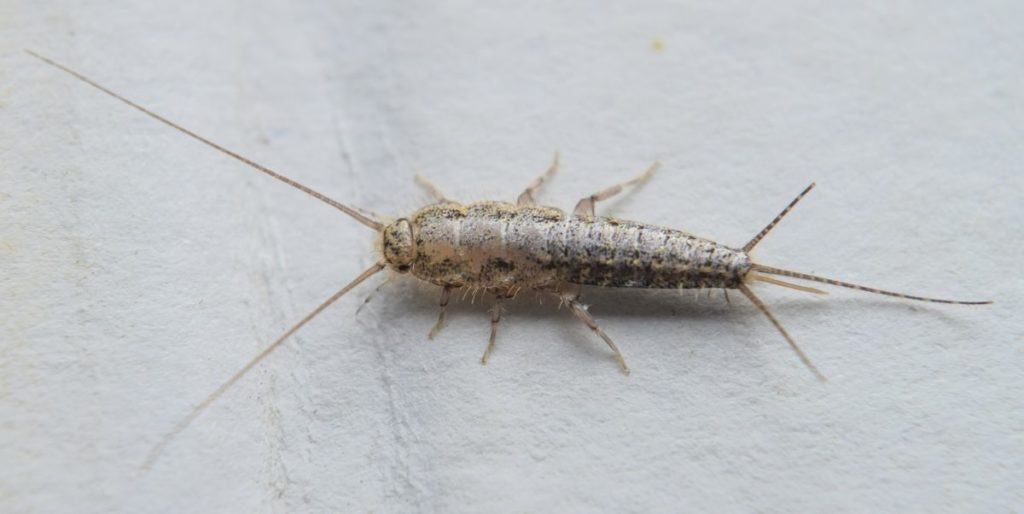
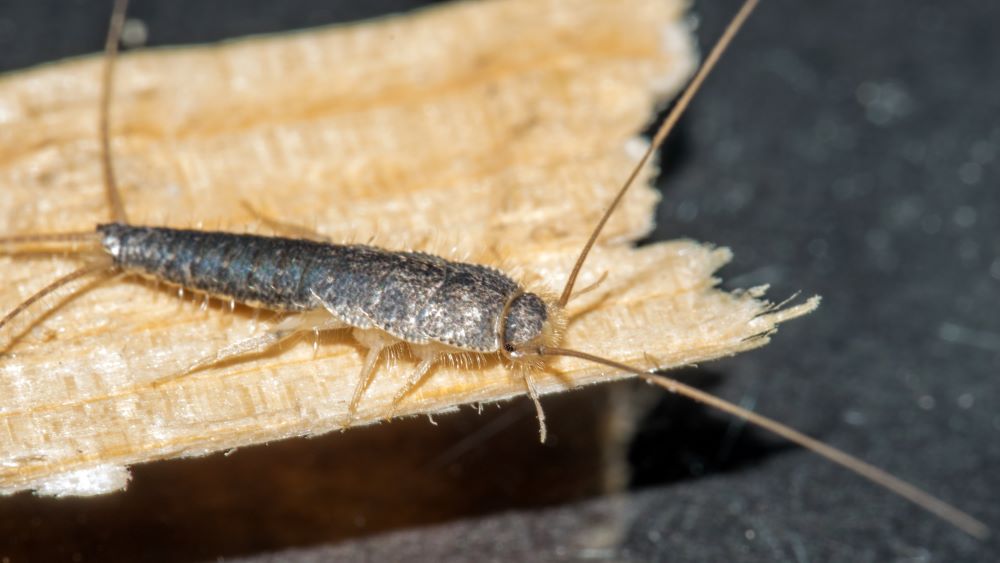
Silverfish, scientifically known as Lepisma saccharina, are small, wingless insects that have a fish-like appearance due to their silvery scales and wiggling movements. They’re nocturnal creatures, meaning they’re most active at night. You might find them lurking in your bathrooms, kitchens, or basements, as they thrive in dark, damp areas.

The Attraction of Insects to Light: An Overview

Insects’ attraction to light is a well-known phenomenon, commonly referred to as phototaxis. However, the reasons behind this attraction vary greatly among different insect species. Some insects use light sources as navigational aids, while others are lured by the warmth that these lights provide. Nevertheless, it’s important to note that not all insects exhibit phototaxis.

Do LED Lights Attract Silverfish?

So, does led lights attracts silverfish? The answer might surprise you. Contrary to popular belief, silverfish aren’t particularly attracted to light, including LED lights. They’re creatures of darkness and prefer to stay hidden in the dark corners of your home. They’re more likely to scurry away when you turn on a light than they are to be lured by it.

Scientific Evidence: Can LED Lights Attract Silverfish?

Scientific studies lend further weight to this claim. A number of studies have shown that silverfish show no positive phototaxis. In fact, they tend to exhibit negative phototaxis, meaning they’re more likely to be repelled by light than attracted to it. Therefore, if you’ve noticed an increase in silverfish activity around your LED lights, it’s likely due to other factors.

Factors That Attract Silverfish to Your Home

Silverfish are primarily attracted to moist, humid environments, and they feed on a wide variety of substances, including paper, glue, cotton, linen, and even dead insects. If your home offers these conditions and resources, it might be inadvertently inviting silverfish.

How to Prevent Silverfish Infestation

The key to preventing silverfish infestations is by making your home less attractive to them. This can be achieved by reducing moisture levels, sealing off potential entry points, and removing their food sources. Regular cleaning and vacuuming can also help to keep these pesky insects at bay.

Professional Pest Control for Silverfish Infestations

If you’re facing a serious silverfish infestation and DIY methods aren’t cutting it, it’s time to call in the professionals. Recon Pest Services is your one-stop-shop for silverfish control in the Omaha and Lincoln areas. Contact us today for a free quote, and start living silverfish free today!

Conclusion: Can LED Lights Attract Silverfish?

In conclusion, while LED lights might attract some insects, silverfish aren’t among them. They prefer the darkness and are more likely to be repelled by light. So, if you’ve been worried about your LED lights attracting silverfish, you can put those fears to rest. Remember, the key to a silverfish-free home is maintaining a dry, clean environment and seeking professional help when needed.

Recon CTAs 1200x200 General

Unveiling the Mystery: What Do Silverfish Eat? An In-depth Analysis

What do silverfish eat

You’ve probably come across them in your bathroom or kitchen, these small silver creatures that scuttle away when you turn on the light. Yes, we’re talking about silverfish. They’re a common household pest that can be quite a nuisance, but do you really know what they are? Or what they eat? This article will delve into the mystery and bring you face-to-face with the fascinating world of the silverfish diet.

But before we dive into what do silverfish eat, let’s take a moment to understand these creatures a little better. Silverfish are small, wingless insects known for their fish-like appearance and movements. They’re nocturnal and prefer to live in damp, dark places, like your kitchen or bathroom.

These insects have been on earth for over 400 million years, predating dinosaurs by a long shot. Despite their longevity, silverfish are still quite mysterious, largely due to their nocturnal habits and elusive nature. That’s why we’re here today, to unveil the mystery of what silverfish eat.

What Are Silverfish?

Silverfish are small, wingless insects that belong to the order Thysanura. They get their name from their silvery-blue color and the fish-like way they move. Their bodies are teardrop-shaped, and they have three long bristles on their rear end. Silverfish are nocturnal creatures and can live up to eight years, which is quite long for an insect.

Despite their small size, silverfish are quite hardy. They can survive in almost any climate, but they prefer humid and damp areas. This is why you often find them in bathrooms, kitchens, basements, and attics. They’re also very fast runners, which helps them escape from predators and from your attempts to squash them.

Now that you know what silverfish are, you might be wondering why you should care. Well, while silverfish aren’t dangerous to humans, they can cause damage to your home. They have a penchant for paper and damp clothing, and large infestations can lead to significant damage. But to understand how to prevent this, we first need to understand what do silverfish eat.

The Diet of a Silverfish: What Do Silverfish Eat?

The diet of a silverfish is quite diverse. These insects are able to eat a variety of substances, thanks primarily to their ability to digest cellulose. In fact, silverfish are among the few animals in the world that can do this.

Silverfish are omnivorous and will eat almost anything. However, they prefer foods high in protein, sugar, or starch. This includes book bindings, wallpaper glue, and some paints. They’ll also eat various types of fabric, especially if it’s been stored in a damp place.

In addition to these, silverfish will eat mold and fungi, which is why they’re often found in damp areas. They’ll also eat other insects and even their own molted skin or eggs if food is scarce. So, what do silverfish eat? The answer is pretty much anything, but they prefer foods rich in carbohydrates and protein.

Factors That Influence What Silverfish Eat

There are several factors that influence what silverfish eat. The first is availability. Silverfish are opportunistic eaters and will consume whatever is available to them. This is why they’re often found in kitchens and bathrooms, where there’s plenty of food and moisture.

The second factor is moisture. Silverfish need a high humidity environment to survive, and they get much of their water from the food they eat. This is why they’re often found in damp areas and why they prefer to eat moist foods.

The third factor is competition. If there are other insects in the area that eat the same food, silverfish may be forced to change their diet. They’re not particularly aggressive, so they’ll usually retreat if there’s competition.

Common Misconceptions About the Silverfish Diet

There are several misconceptions about the silverfish diet. The most common is that they only eat paper and clothes. While it’s true that silverfish can and do eat these items, they’re not their only source of food. As we’ve seen, silverfish can eat a wide variety of foods, including mold, other insects, and their own exoskeletons.

Another misconception is that silverfish eat wood. This is not true. While silverfish can damage wood by eating the glue that holds it together, they do not actually eat the wood itself. This is an important distinction to make, especially when it comes to controlling silverfish infestations.

The Impact of the Silverfish Diet on Their Habitat

The diet of a silverfish can have a significant impact on their habitat. Because they eat a wide variety of foods, they can survive in many different environments. This is one of the reasons why they’re such a common household pest.

However, their diet can also lead to damage. Silverfish can cause significant damage to books, wallpaper, and clothes. They can also contaminate food with their droppings. This is why it’s important to control silverfish infestations.

Prevention and Control: Keeping Silverfish Away by Controlling Their Diet

The key to preventing and controlling silverfish infestations is to control their diet. By removing their food sources, you can make your home less attractive to them.

Start by reducing the humidity in your home. Use a dehumidifier in damp areas and fix any leaks that may be providing silverfish with a water source. Also, keep your home clean. Vacuum regularly to remove food crumbs and store food in airtight containers.

In addition to these measures, you can also use insecticides or call a professional pest control service. These methods can be effective, but they should be used as a last resort. Prevention is always the best strategy when it comes to silverfish.

Conclusion: The Importance of Understanding What Silverfish Eat

Understanding what silverfish eat is crucial for controlling them. By knowing their diet, you can remove their food sources and make your home less attractive to them. You’ll also be able to spot an infestation early, before it can cause significant damage.

Remember, silverfish are hardy creatures. They’ve survived on earth for over 400 million years, and they can live up to eight years. If you want to get rid of them, you’ll need to be persistent.

But don’t worry, you’re not alone. There are plenty of resources available to help you, including professional pest control services. So, if you’re wondering what do silverfish eat and how you can use this information to control them, don’t hesitate to reach out for help.

For the best pest management solutions in Omaha and Lincoln, contact Recon Pest Services for a free quote. Our team of experts will be more than happy to help you understand what silverfish eat and how to control them.

Recon CTAs 1200x200 General

Ticks in Nebraska: Identification, Prevention, and Treatment

Ticks in Nebraska

Are you a resident of Nebraska or planning a visit to this beautiful state? If so, it’s essential to be aware of the presence of ticks and the potential risks they pose. Ticks are blood-sucking arachnids that can transmit various diseases and pathogens, including Lyme disease and Rocky Mountain spotted fever. In this comprehensive guide, we will delve into the world of ticks in Nebraska, providing you with valuable information on identification, prevention, and treatment. So, let’s jump right in and explore the diverse tick species found in Nebraska!

Understanding the Species of Ticks in Nebraska

Nebraska is home to several tick species, each with its own unique characteristics and habitats. By familiarizing yourself with these species, you can better protect yourself and your loved ones from potential tick-borne diseases. Let’s take a closer look at the most common tick species found in Nebraska:

1. American Dog Tick (Dermacentor variabilis)

The American Dog Tick, also known as the wood tick, is one of the largest ticks found in Nebraska. These ticks are primarily active during the spring and summer months, posing the highest risk of bites during this time. While both male and female American Dog Ticks can bite humans, it is the adult females that are most likely to do so. They are known to transmit diseases such as tularemia and Rocky Mountain spotted fever. It’s important to note that these ticks can be found in urban areas around dogs and people.

2. Lone Star Tick (Amblyomma americanum)

The Lone Star Tick is another common tick species in Nebraska. Female Lone Star Ticks have a distinctive “lone star” marking on their back, making them easy to identify. These ticks are aggressive feeders and are most active during the nymph and adult female stages. While lone star tick bites can be irritating and cause discomfort, not all bites result in infection. However, they have been known to transmit diseases such as ehrlichiosis, tularemia, Heartland virus, Bourbon virus, and STARI. There is also growing evidence suggesting that the bite of this tick may trigger Alpha-Gal Syndrome.

3. Brown Dog Tick (Rhipicephalus sanguineus)

The Brown Dog Tick is a widespread tick species found in Nebraska and is known for its unique ability to complete its entire life cycle indoors. These ticks are reddish-brown in color and have an elongated body shape. While they primarily feed on domestic dogs, they can also bite humans and other mammals. Brown Dog Ticks can transmit diseases such as Rocky Mountain spotted fever and canine tick paralysis. It’s important to be vigilant if you find these ticks in your home, as they can reproduce and infest your living space.

4. Deer Tick (Ixodes scapularis)

The Deer Tick, also known as the black-legged tick, is less common in Nebraska but still present. These ticks have distinct black legs and mahogany brown bodies. They are capable of transmitting Lyme disease, making them a concern for public health. Deer ticks primarily feed on small to medium-sized mammals, including raccoons, foxes, and white-tailed deer. Although the risk of Lyme disease transmission in Nebraska is low, it’s crucial to be aware of the potential risks associated with these ticks.

The Life Cycle of Ticks in Nebraska

Before we dive into prevention and treatment strategies, it’s important to understand the life cycle of ticks. Ticks go through three life stages: larva, nymph, and adult. Each stage requires a blood meal to progress to the next stage. Let’s break down the life cycle of ticks:

  1. Larva: Larval ticks hatch from eggs and are tiny, typically only about the size of a pinhead. They must find a host to feed on, usually small mammals or birds.

  2. Nymph: After feeding as larvae, ticks molt into nymphs. Nymphs are larger than larvae and can transmit diseases if infected. They typically feed on small to medium-sized mammals or birds.

  3. Adult: Once nymphs have fed, they molt into adult ticks. Adult ticks are the largest and most visible stage. Female adult ticks require a blood meal to reproduce, while male adult ticks usually feed only sparingly.

Understanding the life cycle of ticks is crucial for effective prevention and treatment. By targeting specific stages of the life cycle, you can reduce the risk of tick bites and the transmission of tick-borne diseases.

Seasons for Ticks in Nebraska

Ticks in Nebraska are most active from April to October, with peak activity occurring in the spring and summer months. During this time, it’s important to take extra precautions to avoid tick bites. Ticks thrive in warm and humid environments, making Nebraska’s climate ideal for their survival. Whether you’re planning outdoor activities or simply enjoying nature, it’s crucial to be prepared and protect yourself from these blood-sucking parasites.

Prevention Strategies: How to Avoid Tick Bites

Prevention is key when it comes to avoiding tick bites and the potential diseases they can transmit. Here are some effective strategies to protect yourself and your loved ones from ticks in Nebraska:

  1. Wear protective clothing: When venturing into tick-prone areas, wear long sleeves, long pants, socks, and closed-toe shoes. Tuck your pants into your socks or boots to create a barrier against ticks.

  2. Apply tick repellent: Use an EPA-approved tick repellent on exposed skin and clothing. Look for products containing DEET, picaridin, or permethrin. Follow the instructions on the label for safe and effective use.

  3. Perform regular tick checks: After spending time outdoors, thoroughly check your body for ticks. Pay close attention to areas such as the scalp, behind the ears, underarms, groin area, and between toes. Promptly remove any ticks you find.

  4. Create a tick-safe yard: Keep your yard well-maintained by regularly mowing the grass, removing leaf litter, and trimming shrubs. Consider creating a barrier between wooded areas and your yard, such as a gravel or wood chip border.

  5. Protect your pets: Use tick preventatives on your pets, such as tick collars, spot-on treatments, or oral medications. Consult with your veterinarian to determine the best tick prevention options for your furry friends.

By implementing these preventative measures, you can significantly reduce your risk of encountering ticks and experiencing tick-borne diseases.

Tick Bite Treatment and Removal

Despite taking preventive measures, it’s still possible to get bitten by a tick. If you discover a tick attached to your skin, it’s important to remove it safely and promptly. Follow these steps for tick bite treatment and removal:

  1. Use fine-tipped tweezers: Grasp the tick as close to the skin’s surface as possible. Avoid squeezing or crushing the tick, as this can increase the risk of disease transmission.

  2. Pull upward with steady pressure: Gently and steadily pull the tick upward without twisting or jerking. Aim to remove the entire tick, including its mouthparts.

  3. Clean the bite area: After removing the tick, clean the bite area with soap and water or an antiseptic solution.

  4. Dispose of the tick: Place the tick in a sealed bag or container. If you develop symptoms or need to identify the tick, consider saving it for further analysis.

  5. Monitor for symptoms: Watch for any signs of illness or allergic reactions, such as rash, fever, headache, muscle aches, or joint pain. If you experience any concerning symptoms, seek medical attention.

It’s important to note that not all ticks carry diseases, but it’s essential to remain vigilant and monitor your health after a tick bite.

Seeking Professional Assistance

If you’re dealing with a severe tick infestation or require professional assistance, it’s best to consult a pest control professional like Recon Pest Services. With their expertise and award-winning pest management solutions, they can help you eliminate ticks and create a pest-free environment. Contact Recon Pest Services today for a free quote and reclaim your living space from these unwanted intruders.

Final Thoughts

Ticks in Nebraska can pose a risk to your health and well-being, but with the right knowledge and preventative measures, you can minimize that risk. By understanding the tick species found in Nebraska, recognizing their habitats, and implementing effective prevention strategies, you can enjoy outdoor activities while staying protected. Remember to perform regular tick checks, promptly remove any attached ticks, and seek medical attention if necessary. Stay informed, stay vigilant, and stay tick-free in Nebraska!

A Comprehensive Guide to Identifying Flea Bites on Dogs

As a dog owner, you know that fleas can be a persistent and annoying problem for your beloved pet. Not only do these tiny parasites cause itching and discomfort, but they can also lead to serious health issues if left untreated. But what do flea bites look like on dogs? And how can you tell if your dog has been bitten by fleas?

In this comprehensive guide, we’ll explore the itchy truth behind flea bites on dogs, including the importance of identifying flea bites, signs and symptoms, common areas where fleas are most likely to bite, and the life cycle of fleas. We’ll also discuss complications associated with flea bites, home remedies for treating them, prevention tips for dog owners, and when it’s time to consult a veterinarian. So, let’s dive in and uncover the itchy truth about flea bites on dogs.

The importance of identifying flea bites

Flea bites are more than just a minor annoyance for your dog. They can cause severe itching and discomfort, leading to excessive scratching or biting at the affected areas. This, in turn, can result in skin irritation, inflammation, and even open wounds that can become infected if not treated promptly.

In addition to the physical discomfort, fleas can also transmit diseases and parasites to your dog, such as tapeworms or Bartonella (also known as cat scratch fever). Flea allergy dermatitis, a common allergic reaction to flea saliva, can also develop in some dogs, causing even more severe itching and skin issues.

By learning to identify flea bites on your dog and taking action to treat and prevent flea infestations, you can help protect your pet’s health and well-being.

What do flea bites look like on dogs: signs and symptoms

Flea bites can be challenging to spot, especially on dogs with thick fur. However, there are some key signs and symptoms that can help you determine if your dog has been bitten by fleas:

  1. Itching and scratching: One of the most obvious signs of flea bites is excessive itching, scratching, or biting at the affected areas. Your dog may also be more restless than usual or have difficulty sleeping due to the discomfort.
  2. Red, irritated skin: Flea bites can cause redness, swelling, and irritation in the affected areas, which can become more pronounced if your dog is allergic to flea saliva.
  3. Small, raised bumps: Flea bites often appear as small, raised bumps or welts on your dog’s skin. These may be red or pink in color and may feel warm to the touch.
  4. Hair loss: In severe cases, your dog may lose hair in the areas where they have been bitten by fleas, particularly if they are excessively scratching or biting at the skin.
  5. Flea dirt: Flea dirt, or flea feces, can often be found on your dog’s coat, particularly in areas where fleas are most likely to bite. This may appear as small, dark specks or flakes, which can be easily mistaken for dirt or dandruff.

Common areas for flea bites on dogs

Fleas are most likely to bite your dog in areas where their fur is thinner and their skin is more accessible. Some common areas where flea bites are likely to occur include:

  1. The base of the tail: This is a popular spot for fleas to bite, as it is relatively easy for them to reach and provides good cover from your dog’s attempts to scratch or bite at them.
  2. The groin and inner thighs: The skin in these areas is typically thinner and more exposed, making it an attractive target for fleas.
  3. The armpits: Like the groin, the armpits provide a warm, protected environment that fleas find appealing.
  4. The belly: Fleas may also target your dog’s belly, particularly if they have a thin or sparse coat in this area.
  5. The ears and face: In some cases, fleas may bite your dog’s ears or face, particularly if they have thin fur or are already infested with fleas.

The life cycle of fleas and how infestations occur

Fleas have a complex life cycle that consists of four stages: egg, larva, pupa, and adult. Understanding this cycle can help you better understand how infestations occur and how to effectively treat and prevent them.

Eggs: Female fleas lay their eggs on your dog’s coat, where they can easily fall off and become dispersed throughout your home. These eggs are tiny, white, and oval-shaped, making them difficult to spot with the naked eye.

Larvae: After about two days, the eggs hatch into larvae. These worm-like creatures feed on organic debris, such as dead skin cells and flea feces, and can be found in carpets, bedding, and other areas where your dog spends time.

Pupae: After about a week, the larvae spin protective cocoons and enter the pupal stage. Pupae can remain dormant for several months, waiting for the right conditions (e.g., warmth, humidity, or the presence of a host) before emerging as adult fleas.

Adults: Adult fleas are skilled jumpers and can easily leap onto your dog when they come into contact with infested environments. Once on your dog, they feed on their blood and reproduce, starting the cycle all over again.

Complications associated with flea bites on dogs

As mentioned earlier, flea bites can lead to complications if not treated promptly. Some potential issues that may arise from flea infestations include:

  1. Flea allergy dermatitis: This is a common allergic reaction to flea saliva, which can cause severe itching, redness, and inflammation in affected dogs. In some cases, it may even lead to hair loss, scabs, or open sores.
  2. Infections: Open wounds caused by excessive scratching or biting at flea bites can become infected, leading to further complications and potential health risks for your dog.
  3. Anemia: In severe infestations, the blood loss caused by numerous flea bites can lead to anemia (a deficiency of red blood cells), which can be life-threatening if left untreated.
  4. Tapeworms: Fleas can transmit tapeworms to your dog if they ingest an infected flea while grooming themselves. Tapeworms can cause digestive issues, weight loss, and other health problems if not treated.

Home remedies for treating flea bites

If you suspect your dog has been bitten by fleas, there are several home remedies you can try to help alleviate their discomfort and treat the bites:

  1. Cold compresses: Applying a cold compress to the affected areas can help reduce inflammation and provide some relief from itching.
  2. Oatmeal baths: Oatmeal has soothing properties that can help alleviate itching and irritation. Mix some colloidal oatmeal with water to create a paste, then gently apply it to the affected areas on your dog’s skin. Alternatively, you can add some colloidal oatmeal to a warm bath and let your dog soak for 10-15 minutes.
  3. Aloe vera gel: Aloe vera has natural anti-inflammatory and soothing properties that can help reduce redness and irritation caused by flea bites. Apply a thin layer of aloe vera gel to the affected areas on your dog’s skin.
  4. Apple cider vinegar: Dilute apple cider vinegar with an equal amount of water, then apply the solution to your dog’s skin using a spray bottle or a clean cloth. This can help soothe itching and irritation.
  5. Epsom salt baths: Epsom salt can help reduce inflammation and soothe irritated skin. Add a cup of Epsom salt to a warm bath and let your dog soak for 10-15 minutes.

Preventing flea infestations: Tips for dog owners

Preventing flea infestations is essential for the health and well-being of your dog. Here are some tips to help you keep fleas at bay:

  1. Regularly groom your dog: Keeping your dog’s coat clean and well-groomed can help deter fleas and make it easier for you to spot any signs of infestation.
  2. Use flea preventatives: Talk to your veterinarian about the best flea preventative options for your dog. This may include topical treatments, oral medications, or flea collars.
  3. Keep your home clean: Regularly vacuum your carpets, floors, and furniture to remove any flea eggs, larvae, or pupae that may be present. Wash your dog’s bedding and toys frequently.
  4. Treat your yard: Fleas can thrive in outdoor environments, so consider using flea control products in your yard to help prevent infestations.
  5. Check for fleas regularly: Regularly inspect your dog for any signs of flea bites or infestations. This can help you catch and treat any issues before they become more severe.

When to consult a veterinarian for flea bites

While home remedies can be helpful in treating flea bites, it’s essential to consult your veterinarian if:

  1. Your dog’s symptoms worsen or do not improve after trying home remedies
  2. Your dog develops signs of infection, such as swelling, pus, or a foul odor around the bites
  3. Your dog is experiencing severe discomfort, lethargy, or loss of appetite
  4. You suspect your dog may have a flea allergy or other complications related to flea bites

Your veterinarian can recommend appropriate treatments for your dog’s specific needs and help you develop a comprehensive plan for preventing future flea infestations.

If you’re concerned about potential flea bite allergies, please consult this article from VetDerm.

Conclusion

Flea bites can cause significant discomfort and health issues for your beloved pet, but by learning to identify the signs and symptoms of flea bites, you can take the necessary steps to treat and prevent infestations. Remember to consult your veterinarian if you have any concerns about your dog’s health or if you need guidance on treating flea bites and preventing future infestations.

If you have a flea infestation, Recon Pest Services is here to help. Serving the greater Omaha & Lincoln areas, we can handle even the peskiest of fleas. Contact us for a free quote!

By taking a proactive approach to flea prevention and treatment, you can help ensure your dog’s health and well-being. Regular grooming, the use of flea preventatives, and keeping your home and yard clean are all essential steps in preventing flea infestations. However, if you do notice signs of flea bites on your dog, it’s important to take action promptly.

Home remedies, such as cold compresses, oatmeal baths, and aloe vera gel, can provide temporary relief from itching and irritation. However, if your dog’s symptoms persist or worsen, it may be necessary to consult your veterinarian for more advanced treatment options.

Ultimately, by staying informed about flea bites and taking preventative measures, you can help ensure that your dog remains happy, healthy, and free from flea infestations. And if you do need assistance with flea control, don’t hesitate to reach out to Recon Pest Services for expert help and guidance.

Catch Crickets with Ease: Learn How to Make Your Own Homemade Cricket Trap!

Have you ever been kept awake at night by the incessant chirping of crickets? Or perhaps you’ve discovered these little critters munching on your precious plants or invading your home? Fear not, for there is a solution to your cricket woes: a homemade cricket trap. This article will provide you with all the information you need to make your own cricket trap, from the materials required to step-by-step instructions, as well as handy tips to ensure your trap is as effective as possible.

Crickets are more than just a nuisance; they can cause damage to your home, garden, and even your stored items. They are known to feed on a variety of materials, including fabrics, paper, and plants. Moreover, their droppings can create unsightly messes and even trigger allergies in some individuals. Therefore, it’s important to address a cricket infestation as soon as you become aware of it.

In this comprehensive guide, we’ll explore the benefits of using a homemade cricket trap and explain how to create one that effectively catches these pesky insects.

We’ll also discuss proper placement and handling techniques, as well as alternative methods for controlling cricket populations and important safety precautions to keep in mind.

Why catch crickets with a homemade trap?

You might be wondering why you should bother making your own cricket trap when there are plenty of commercially available options on the market. The answer is simple: homemade cricket traps are often more cost-effective, environmentally friendly, and just as efficient as their store-bought counterparts.

By creating your own cricket trap, you can save money on expensive pest control services or store-bought traps that may contain harmful chemicals. Additionally, homemade traps can be easily customized to suit your specific needs and preferences, allowing you to target specific cricket species or adapt the trap to your home or garden environment.

Lastly, using a homemade cricket trap is an eco-friendly solution that won’t harm other wildlife or introduce potentially hazardous chemicals into your surroundings.

Materials needed for a homemade cricket trap

Constructing a homemade cricket trap is relatively simple and requires only a few basic materials, most of which can be found around your home or purchased at a local store. Here’s a list of the items you’ll need:

  1. A plastic container (such as a large yogurt tub, plastic bottle, or Tupperware)
  2. A sharp knife or pair of scissors
  3. Tape (duct tape, electrical tape, or packing tape)
  4. Bait (suggestions include fruit, molasses, bread, or cornmeal)
  5. A small dish or container for the bait
  6. Optional: A small piece of cardboard or paper for a ramp

With these materials in hand, you’re ready to start building your homemade cricket trap.

Step-by-step guide to making your own cricket trap

Now that you have all the necessary materials, it’s time to assemble your cricket trap. Follow these steps to create a simple yet effective homemade cricket trap:

1. Prepare the container: Using the knife or scissors, carefully cut a few small holes near the top of the container. These holes will allow air to circulate inside the trap, making it more inviting for crickets.

2. Create entrances: Cut several entry points around the base of the container. These should be large enough for crickets to easily crawl through but not so big that they can easily escape. You can also use the knife to create small notches or grooves near the openings to help crickets climb into the trap.

3. Secure the container: To prevent crickets from escaping through the top of the container, tape the lid securely in place. Make sure there are no gaps or openings that could allow crickets to escape.

4. Place bait: Pour a small amount of bait into the dish or container and place it inside the trap. You can experiment with different types of bait to see which is most attractive to the crickets in your area.

5. Position the ramp: If you’re using a ramp to help crickets enter the trap, position it near one of the entry points. This will make it easier for crickets to climb into the container.

6. Monitor the trap: Check the trap regularly to see if it has caught any crickets. Once you’ve captured a few, you can release them far away from your home or garden, or dispose of them humanely.

Tips for making your cricket trap more effective

To increase the effectiveness of your homemade cricket trap, consider the following tips:

1. Choose the right bait: Experiment with different types of bait to determine which is most attractive to the crickets in your area. Some common options include fruit, bread, molasses, or cornmeal

2. Keep the trap clean: Crickets are more likely to enter a clean, odor-free environment. Regularly clean your trap, and replace the bait as needed.

3. Use multiple traps: If you have a large cricket infestation, consider setting up several traps around your home or garden. This will increase your chances of capturing crickets and help you determine which areas are most heavily infested.

4. Make the trap more inviting: Crickets are more likely to enter a trap that provides a comfortable, dark environment. Consider covering the outside of the container with black tape or paint to make it more appealing.

5. Be patient: It may take some time for crickets to find and enter your trap, so be patient and give the trap several days to work.

Proper placement and location for your homemade cricket trap

The success of your homemade cricket trap largely depends on where you place it. To maximize your chances of catching crickets, consider the following tips for trap placement:

1. Place traps near cricket hiding spots: Crickets often hide in dark, damp areas during the day, such as under rocks, logs, or piles of leaves. Place your trap close to these hiding spots to increase your chances of catching crickets.

2. Position traps along cricket travel routes: Crickets typically follow the same routes when searching for food or mates, so placing traps along these pathways can improve your chances of capturing them.

3. Set traps near cricket food sources: If crickets are feeding on your plants, place traps near the affected areas. Crickets are also attracted to light, so setting traps near outdoor lights or windows can be effective.

4. Elevate traps if necessary: If you’re trying to catch tree-dwelling crickets, you may need to elevate your trap using a tree branch or other support structure.

5. Monitor traps and adjust as needed: Regularly check your traps to determine their effectiveness and adjust the placement as needed. If a trap isn’t catching any crickets, try moving it to a different location.

How to handle and release the captured crickets

Once you’ve captured some crickets in your homemade cricket trap, you’ll need to decide what to do with them. If you’d like to release the crickets back into the wild, follow these steps to ensure a safe and humane release:

  1. Choose a suitable release location: Find a location that is far away from your home or garden, preferably in a natural habitat where the crickets can find food and shelter.
  2. Prepare the release site: Clear away any debris or obstacles that could prevent the crickets from escaping the trap once it’s opened.
  3. Open the trap: Carefully open the lid of the container, taking care not to harm the crickets inside.
  4. Allow the crickets to leave the trap: Give the crickets time to crawl out of the container and into their new environment. You can gently tap the container to encourage them to leave, but avoid forcibly removing them, as this could cause injury.
  5. Dispose of the trap: Once all the crickets have been released, dispose of the trap according to your local waste disposal regulations.

Alternative methods to control cricket populations

If your homemade cricket trap isn’t providing the desired results, or you’d like to explore additional methods for controlling cricket populations, consider the following alternatives:

  1. Natural predators: Encourage natural predators, such as birds, lizards, or frogs, to visit your garden or yard by providing suitable habitats and food sources.
  2. Chemical control: Use insecticides or baits specifically designed for cricket control. Always follow the manufacturer’s instructions and take necessary safety precautions when using chemicals.
  3. Physical barriers: Install physical barriers, such as mesh screens or weather stripping, to prevent crickets from entering your home or garden.
  4. Cultural control: Modify your environment to make it less appealing to crickets. This could include removing hiding spots, reducing moisture, or turning off outdoor lights at night.
  5. Professional pest control: If you have a severe cricket infestation, it may be necessary to enlist the help of a professional pest control service.

For more information on the safe use of pesticides, please read this article from the EPA.

Safety precautions when using homemade cricket traps

While homemade cricket traps are generally safe and environmentally friendly, it’s important to take certain precautions to protect yourself, your family, and your pets:

  1. Avoid using harmful substances: When creating your homemade cricket trap, avoid using materials or substances that could be harmful to humans or animals, such as toxic chemicals or sharp objects.
  2. Keep traps away from children and pets: Place your traps in areas that are inaccessible to children and pets to prevent accidents or injuries.
  3. Practice proper hygiene: Always wash your hands thoroughly after handling crickets or cricket traps, as some cricket species can carry diseases or allergens.
  4. Use caution when releasing crickets: When releasing captured crickets, be mindful of your surroundings and avoid releasing them near other people’s homes or gardens.

Enjoy a cricket-free home

By following the instructions and tips provided in this article, you can create an effective homemade cricket trap that will help you control cricket populations in your home or garden. With patience, persistence, and proper trap placement, you’ll be well on your way to enjoying acricket-free environment. Remember to always handle crickets and cricket traps with care and take necessary safety precautions. If you have a severe cricket infestation or would like additional assistance, consider reaching out to a professional pest control service.

At Recon Pest Services, we specialize in pest control services for the Greater Omaha & Lincoln areas. Our experienced team can help you identify and address a variety of common pests, including crickets. Contact us today for a free quote and take the first step towards a pest-free home or business.

Bug Diets: Do Spiders Eat Cockroaches?

pexels egor kamelev 1038027do spiders eat cockroaches

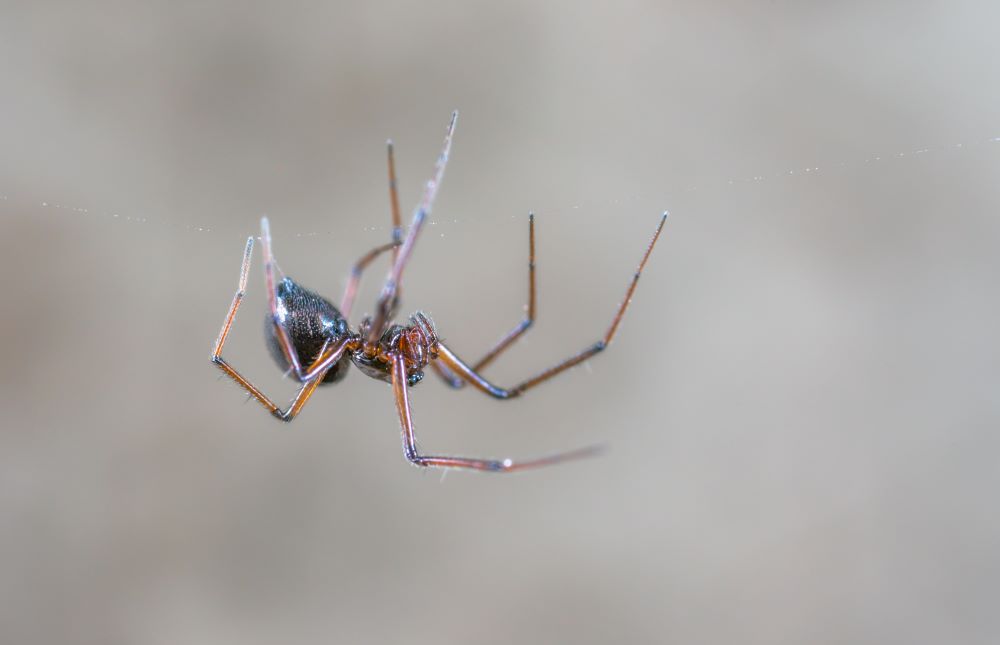
Spiders are fascinating creatures that are widely known for their ability to spin webs and catch prey. They are found in almost every part of the world and come in a variety of shapes and sizes. Spiders are carnivorous, which means that they feed on other animals. But, do spiders eat cockroaches? In this article, we will explore the diets of spiders and find out if they do indeed eat cockroaches.

Introduction to Spider Diets

Spiders are predators that feed on a variety of insects, including flies, mosquitoes, moths, and beetles. They also eat other spiders, small birds, and even small mammals. Spiders use different methods to catch their prey, including trapping them in webs, jumping on them, or ambushing them.


Cockroaches as a Potential Prey for Spiders

Cockroaches are one of the most common insects found in homes and buildings. They are known for their resilience and ability to survive in almost any environment. Cockroaches can be a nuisance and are often considered pests. But, are they a potential prey for spiders?


Spider Species That Eat Cockroaches

There are many species of spiders that eat cockroaches. Some of the most common ones include wolf spiders, jumping spiders, and huntsman spiders. Wolf spiders are known for their speed and agility and are often found hunting cockroaches at night. Jumping spiders are small but deadly, and they use their exceptional eyesight to track and capture their prey. Huntsman spiders are large and fast and can take down even the biggest cockroaches.


How Spiders Catch and Consume Cockroaches

Spiders use different methods to catch and consume their prey, depending on the species. Some spiders spin webs to trap their prey, while others hunt them down. When a spider catches a cockroach, it injects it with venom to immobilize it. The venom also helps to digest the prey, making it easier for the spider to consume.


Benefits of Spiders Eating Cockroaches

Spiders play an important role in controlling the population of insects, including cockroaches. By eating cockroaches, spiders help to reduce their numbers, which can be beneficial for humans. Cockroaches can carry diseases and allergens, so reducing their population can help to prevent illness and allergy symptoms.


Other Insects That Spiders Eat

Spiders eat a variety of insects, including flies, mosquitoes, moths, and beetles. They also eat other spiders, small birds, and even small mammals. Some spiders are generalists, meaning that they will eat anything they can catch. Others are specialists, meaning that they only eat specific types of prey.


The Role of Spiders in Natural Pest Control

Spiders play an important role in natural pest control. They help to keep the population of insects in check, which can be beneficial for humans. By reducing the number of insects, spiders can help to prevent the spread of diseases and prevent damage to crops.


How to Prevent Cockroaches and Spiders in Your Home

Preventing cockroaches and spiders in your home can be challenging, but there are some things you can do to reduce their numbers. Keep your home clean and free of clutter, as cockroaches and spiders like to hide in dark, damp places. Seal up any cracks or crevices in your home to prevent them from entering. Use insecticides and pest control services to help keep their populations under control.


Conclusion

In conclusion, spiders do eat cockroaches, and they play an important role in natural pest control. By reducing the number of cockroaches and other insects, spiders can help to prevent the spread of diseases and prevent damage to crops. If you have a problem with cockroaches or spiders in your home, consider using pest control services to help keep their populations under control. For all your pest removal needs, Recon Pest Services is here to help. Contact us today for a free quote!

Rodent Diets: Do Mice Eat Roaches?

Do mice eat roaches?

Rodents! Pest control agencies love to hate them. They are small creatures that are commonly found in unlucky homes and other living spaces. While they may seem harmless, rodents can cause a lot of damage to property and can also pose a health risk to humans.

One of the most common questions people have is whether or not mice eat roaches. In this article, we will explore the feeding behavior of mice and answer the question, do mice eat roaches?


Understanding the Feeding Behavior of Mice

Mice are omnivorous, which means that they eat both plant and animal matter. Their diet can vary depending on the availability of food and their location. In the wild, mice primarily eat seeds, fruits, and insects. However, in urban areas, mice have adapted to eating human food and can be found raiding pantries and garbage cans.

Mice are also opportunistic feeders, which means that they will eat whatever food is available to them. This includes roaches, which are a common food source for mice in urban areas.


Do Mice Eat Roaches?

Yes, mice do eat roaches. In fact, roaches are a common food source for mice in urban areas. Roaches are high in protein and fat, which makes them a nutritious food source for mice. Roaches are also slow-moving and easy to catch, making them an ideal prey for mice.


What Do Mice Usually Eat?

While roaches are a common food source for mice in urban areas, they primarily eat seeds, fruits, and insects in the wild. In urban areas, mice have adapted to eating human food and can be found raiding pantries and garbage cans. Mice will eat a variety of human foods, including grains, meats, and sweets.


Why Do Mice Eat Roaches?

Mice eat roaches because they are a nutritious food source. Roaches are high in protein and fat, which makes them a valuable food source for mice. Roaches are also slow-moving and easy to catch, which makes them an ideal prey for mice.


Dangers of Mice Eating Roaches

While mice eating roaches may not seem like a big deal, it can actually pose a health risk to humans. Roaches are known to carry a variety of diseases, including salmonella and E. coli. If mice are eating roaches, they can become carriers of these diseases and spread them to humans through their feces and urine.


Prevention and Control of Mice and Roaches

The best way to prevent mice and roaches from entering your home is to keep it clean and tidy. This includes regular cleaning and disinfecting of surfaces, as well as proper food storage. It is also important to seal any cracks or gaps in your home to prevent mice and roaches from entering.

If you already have a problem with mice or roaches, it is important to take action to control the infestation. This may include using traps or bait stations to catch and kill the pests. It is also important to clean up any food or debris that may be attracting the pests.


Conclusion

In conclusion, mice do eat roaches. While roaches are a nutritious food source for mice, it can pose a health risk to humans if mice become carriers of diseases. It is important to keep your home clean and tidy to prevent mice and roaches from entering, and to take action to control any infestations that may occur. For all your pest removal needs, Recon Pest Services is here to help. Contact us today for a free quote!

Tiny Ants in Bathroom: Simple Tips to Keep Them at Bay!

Tiny Ants in Bathroom: Simple Tips to Keep Them at Bay!


Are you tired of seeing tiny ants in your bathroom? You’re not alone. Tiny ants, also known as sugar ants or pavement ants, are common pests that can invade your bathroom. They can be a nuisance, crawling on your walls, floors, and even your toothbrush. In this article, we’ll discuss why tiny ants invade your bathroom and provide simple tips to keep them at bay.


Understanding the Behavior of Tiny Ants

Tiny ants are social creatures that live in large colonies. They are attracted to moisture and food sources, making your bathroom an ideal place to thrive. They can enter your bathroom through small cracks and crevices, and once they find a food source, they’ll leave a trail for other ants to follow. This is why you may see a long line of ants marching in and out of your bathroom.


Common Reasons Why Tiny Ants Invade Your Bathroom

Before we discuss tips to get rid of tiny ants in your bathroom, it’s important to understand why they invade your space. Here are some common reasons:

  • Moisture: Tiny ants are attracted to moist environments, and your bathroom provides the perfect conditions for them to thrive. This is why you may see them around your sink, shower, or bathtub.
  • Food Sources: Tiny ants are also attracted to food sources, including toothpaste, soap, and even dead skin cells. If you leave these items out in the open, you may be inviting tiny ants into your bathroom.
  • Nesting Sites: Tiny ants are always looking for new nesting sites, and your bathroom may provide the perfect location. They can build their nests in small cracks and crevices, making it difficult for you to spot them.


Tips to Get Rid of Tiny Ants in Your Bathroom

Now that you understand why tiny ants invade your bathroom, let’s discuss some simple tips to get rid of them:

DIY Remedies to Keep Tiny Ants Away

There are several DIY remedies that you can use to keep tiny ants away from your bathroom. Here are some of the most effective ones:

  • Vinegar: Vinegar is a natural ant repellent that you can use to keep tiny ants away. Mix equal parts of vinegar and water in a spray bottle and spray the solution on the areas where you see ants.
  • Borax: Borax is a natural ant killer that you can use to get rid of tiny ants in your bathroom. Mix equal parts of borax and sugar and place the mixture in a small container near the areas where you see ants.
  • Lemon Juice: Lemon juice is another natural ant repellent that you can use to keep tiny ants away. Squeeze fresh lemon juice on the areas where you see ants and let it dry.

Natural Solutions to Eliminate Tiny Ants in Bathroom

If you prefer natural solutions to eliminate tiny ants in your bathroom, here are some options:

  • Diatomaceous Earth: Diatomaceous earth is a natural ant killer that you can use to get rid of tiny ants. Sprinkle the powder on the areas where you see ants and let it sit for a few hours before vacuuming it up.
  • Essential Oils: Essential oils like peppermint, tea tree, and eucalyptus are natural ant repellents that you can use to keep tiny ants away. Mix a few drops of essential oil with water in a spray bottle and spray the solution on the areas where you see ants.
  • Cinnamon: Cinnamon is a natural ant repellent that you can use to keep tiny ants away. Sprinkle cinnamon powder on the areas where you see ants and let it sit for a few hours before vacuuming it up.

Chemical Solutions to Tackle Tiny Ants in Your Bathroom

If natural remedies don’t work, you may need to use chemical solutions to tackle tiny ants in your bathroom. Here are some options:

  • Ant Baits: Ant baits are a popular way to get rid of tiny ants in your bathroom. They contain a toxic substance that the ants bring back to their colony, killing off the entire colony.
  • Ant Sprays: Ant sprays are another option to get rid of tiny ants in your bathroom. They contain chemicals that kill ants on contact.

Preventing Future Infestations of Tiny Ants in Your Bathroom

To prevent future infestations of tiny ants in your bathroom, here are some tips:

  • Seal Cracks and Crevices: Seal any cracks and crevices in your bathroom to prevent tiny ants from entering your space.
  • Clean Regularly: Clean your bathroom regularly to remove any food sources or moisture that may attract tiny ants.
  • Store Food Properly: Store food items in airtight containers to prevent tiny ants from accessing them.


When to Seek Professional Help

If you’ve tried DIY remedies and chemical solutions and still can’t get rid of tiny ants in your bathroom, it may be time to seek professional help. A pest control professional can assess the situation and provide effective solutions to get rid of tiny ants in your bathroom.


Conclusion

Tiny ants in your bathroom can be a nuisance, but with these simple tips, you can keep them at bay. Remember to understand the behavior of tiny ants and why they invade your bathroom. Use DIY remedies, natural solutions, or chemical solutions to eliminate tiny ants in your bathroom, and take steps to prevent future infestations. If all else fails, seek professional help. For all your pest removal needs, Recon Pest Services is here to help. Contact us today for a free quote!

×