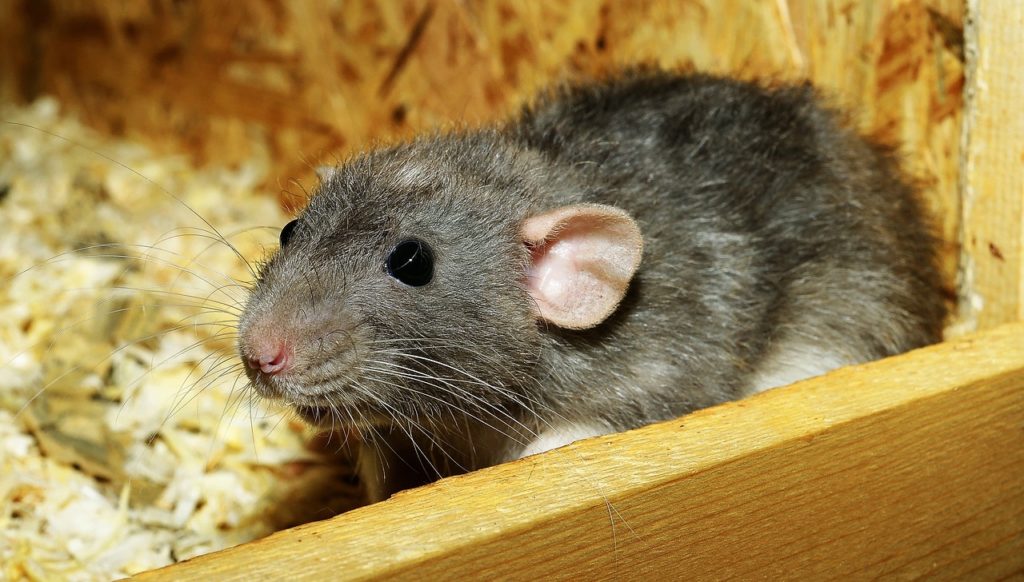
Finding the Best Rat Repellent for Your Home

How to get rid of rat urine smell

Have you ever walked into your kitchen late at night, turned on the lights and witnessed a rat scurrying away? The sight can be quite unsettling, right? Rat infestations are a widespread problem that homeowners grapple with. Not only are these rodents unsightly, but they also pose significant health and property risks. It might be time to start looking for the best rat repellent to keep them away!

The issue with rat infestations is that they are often hard to notice until they become substantial. Rats are nocturnal creatures, and they usually operate under the cloak of darkness. It’s not until you start noticing signs like gnawed furniture, droppings, or unexplained noises in your walls that you realize there’s a problem.

Rats are incredibly adaptable creatures, and once they’ve found a place they deem safe, they multiply rapidly. This adaptability and rapid reproduction make it difficult to eliminate them completely, and that’s where the best rat repellent comes in handy.

The Dangers of Rat Infestations

Let’s delve deeper into why you should be concerned about rat infestations. Firstly, rats carry diseases. Hantavirus, Lassa fever, Leptospirosis, and Plague are some of the diseases transmitted by rats. You, your family, or your pets could contract these diseases through contact with rat urine, droppings, or saliva.

Secondly, rats can cause extensive damage to your property. They chew on almost anything they come across – from wooden furniture to electrical wires, causing significant harm. If they gnaw on your home’s wiring, it could lead to electrical fires.

Lastly, a rat infestation can ruin your home’s aesthetic appeal and potentially decrease its value. Nobody wants to buy or stay in a house infested with rats. Hence, investing in the best rat repellent is a wise decision.

What is a Rat Repellent?

So, what exactly is a rat repellent? It’s a substance or device used to deter rats from invading or staying in your home. Rat repellents come in various forms, including sprays, granules, ultrasonic devices, and electronic repellents. Each type has its mode of operation, but all aim to create an environment that’s unpleasant for the rats, forcing them to leave.

Some repellents use scent to deter rats. These types often contain natural ingredients like peppermint oil, which rats find repulsive. Other repellents use noise or ultrasonic waves that irritate the rats, making your home inhospitable to them.

While rat repellents are not a magic bullet for rat infestations, they form part of an effective rat management strategy. They are particularly useful in preventing rat infestations from occurring in the first place.

How Does Rat Repellent Work?

Rat repellents work by exploiting the rat’s natural aversions. For instance, sprays and granules usually contain substances that rats find offensive. When you apply these repellents around your home, the rats are repelled by the smell and are less likely to invade your space.

On the other hand, ultrasonic and electronic repellents work by emitting high-frequency sounds or electromagnetic fields. These sounds and fields are irritating to rats, but they are inaudible and harmless to humans and most pets.

The effectiveness of rat repellents varies. Some rats may be more resilient and ignore the repellents, while others may be deterred. Therefore, it’s essential to choose the best rat repellent for your specific situation.

Factors to Consider When Choosing the Best Rat Repellent

When choosing the best rat repellent, you need to consider several factors. First, think about the type of repellent. Do you prefer a natural repellent like sprays or granules, or would you rather an ultrasonic or electronic device? Your choice will depend on your personal preferences and the severity of your rat infestation.

Next, consider the safety of the repellent. If you have pets or young children, you’ll want to choose a repellent that is safe for them. Some repellents, especially those containing strong chemicals, can be harmful if ingested or inhaled.

Lastly, consider the effectiveness and longevity of the repellent. Some repellents need to be reapplied frequently, while others, like electronic devices, provide long-lasting protection.

How to Use the Best Rat Repellent Effectively

To get the most out of your rat repellent, you need to use it correctly. If you’re using a spray or granule repellent, apply it in areas where you’ve noticed rat activity. This could be around your kitchen, in your basement, or near potential entry points.

If you’re using an electronic or ultrasonic repellent, place it in an area where its signals will not be obstructed. These devices work best in open spaces where the sound waves or electromagnetic fields can travel freely.

Remember that rat repellent is just one part of a comprehensive rat management strategy. It’s crucial to combine it with other measures like proper sanitation and sealing off potential entry points.

Other Methods to Complement the Best Rat Repellent

While using the best rat repellent is a great start, it’s even better when complemented with other rat control methods. One of these methods is proper sanitation. Rats are attracted to places with easy access to food. By keeping your home clean and properly storing your food, you can make your home less appealing to rats.

Additionally, sealing off potential entry points can help keep rats out. Rats can squeeze through tiny gaps, so make sure to seal off any cracks or holes in your walls, doors, or windows.

Lastly, if your rat infestation is severe, you may need to enlist the help of a pest control professional. They can provide more aggressive treatment options and advice on preventing future infestations.

Conclusion and Final Thoughts

In conclusion, rat infestations are a serious problem that can pose health risks, cause property damage, and even decrease your home’s value. However, by investing in the best rat repellent and complementing it with other rat control methods, you can keep your home rat-free.

Remember, the key to effective rat control is prevention. Make your home unsuitable for rats by maintaining proper sanitation, sealing off potential entry points, and using the best rat repellent.

Worried about rats in your Omaha or Lincoln home? Recon Pest Services can help. Reach out today to get a free consultation, and start living rat free today!

Recon CTAs 1200x200 Rodents

Finding Drywood Termite Droppings: What to Do Next

Drywood termite droppings

Drywood termite droppings can be a hint at serious problems hiding deep within your house. Drywood termites are small, wood-destroying insects that thrive in dry wood, as their name suggests. They are less common than their subterranean counterparts, but they can cause considerable damage to your home if left unchecked. Unlike subterranean termites, drywood termites do not require contact with soil to survive. They can live entirely within the wood they are feeding on, making them a serious threat for homes, furniture, and other wooden structures.

The colony of a drywood termite typically consists of a few hundred to a few thousand termites. While this may seem small compared to other termite colonies, it’s important to remember that drywood termites can set up multiple colonies within the same structure. This means that the total number of termites can be much higher, leading to a greater degree of damage.

Drywood termites are unique in their feeding habits. Their damage typically extends across the grain, digging wide galleries within the wood. This is different from other termites, which usually eat along the grain. This pattern of feeding can weaken the wood from the inside, leading to structural damage in your home.

Understanding Drywood Termite Droppings

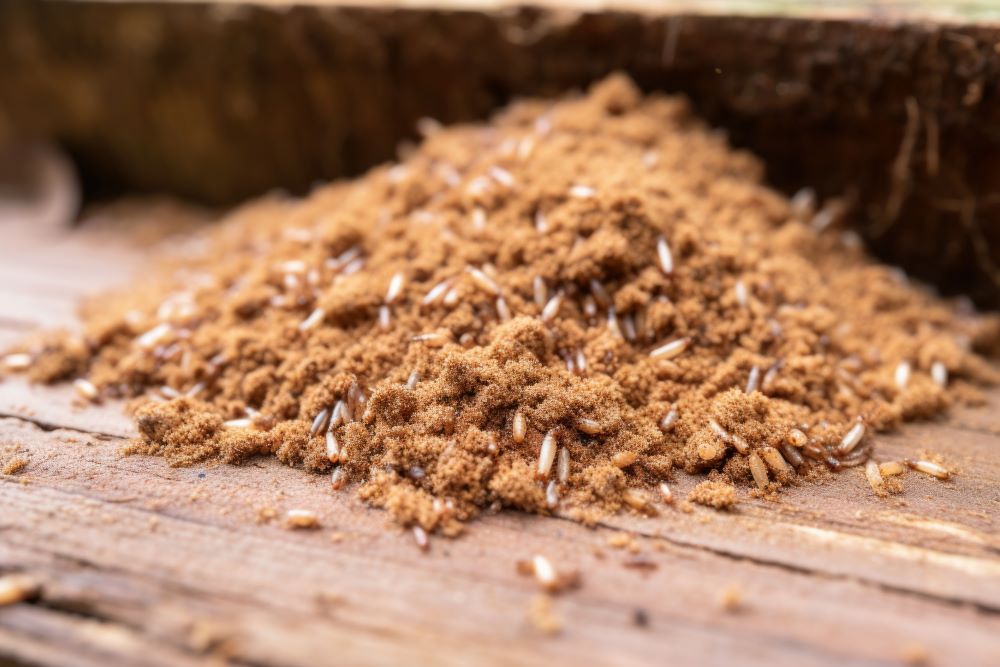
Let’s talk about something a little less pleasant now: drywood termite droppings. Known as frass, these droppings are a clear sign of a drywood termite infestation. They are typically found in small piles near the termites’ entry and exit points. Unlike other termite species, drywood termites do not use their droppings to build their nests. Instead, they push them out of their tunnels, leading to the small piles you may find in your home.

Frass is often described as looking like sawdust or coffee grounds. It can be different colors, depending on the type of wood the termites have been eating. This can make it difficult to identify, especially if you’re not familiar with what you’re looking for. However, there are some key differences between frass and other common household debris. For example, frass will often have a gritty texture, and it will be composed of six-sided pellets.

One important thing to remember about frass is that its presence doesn’t necessarily mean the termites are still active. Drywood termites can push old droppings out of their tunnels long after they’ve moved on to a new feeding site. This means that you could find frass even if the termites are no longer present in that specific area.

Reasons for Finding Drywood Termite Droppings with No Termites

You might be wondering, “Why am I finding drywood termite droppings if I can’t see any termites?” There are several reasons for this. The first and most likely explanation is that the termites are still there, but they’re well hidden. Remember, drywood termites can live entirely within the wood they’re feeding on. This means that they can be difficult to spot, especially if they’re feeding on the inside of a structure.

Another reason you might be finding frass with no termites in sight is that the termites have moved on to a new feeding site. As we mentioned earlier, drywood termites can push old droppings out of their tunnels long after they’ve left the area. This means that the presence of frass doesn’t necessarily indicate an active infestation.

Finally, it’s possible that the termites have died or been killed. If you’ve recently had a pest control treatment, for example, the termites may have been eradicated. However, their droppings could still be present, giving the illusion of an ongoing infestation.

What to Do When You Find Drywood Termite Droppings

So, you’ve found drywood termite droppings in your home. What now? The first thing you should do is to try and determine if the infestation is active. Look for signs of fresh droppings, as this could indicate that the termites are still present. You should also check the wood around where you found the frass for signs of damage. This could include hollow-sounding wood, pinholes in the surface, or even visible tunnels.

If you suspect that the infestation is still active, your next step should be to contact a professional pest control service. They can confirm the presence of termites and provide you with a plan for treatment. It’s important to act quickly, as drywood termites can cause significant damage if left unchecked.

Even if you don’t think the infestation is active, it’s still a good idea to get a professional opinion. Remember, drywood termites can be difficult to spot, and there could be other colonies in your home that you’re not aware of. A professional pest control service can conduct a thorough inspection to ensure that your home is free of termites.

The Importance of Regular Termite Inspections

Regular termite inspections are crucial for keeping your home safe from these destructive pests. By catching an infestation early, you can prevent significant damage and potentially save thousands of dollars in repair costs. An experienced pest control professional can identify signs of termite activity that you might miss, ensuring that no stone is left unturned.

These inspections should be conducted at least once a year, or more frequently if you live in a high-risk area. They should include a thorough check of both the interior and exterior of your home, as well as any outbuildings or other structures on your property.

Remember, termites can be sneaky. They can hide in places you wouldn’t expect, and they can cause damage long before you realize they’re there. Regular inspections are your best defense against these hidden invaders.

Professional Pest Control Services for Drywood Termite Infestations

Professional pest control services are your best option for dealing with a drywood termite infestation. These companies have the expertise and the tools necessary to effectively eradicate termites from your home. They can also provide you with advice on how to prevent future infestations.

There are several different treatment options available for drywood termite infestations, including fumigation, spot treatments, and heat treatments. The best option will depend on the extent of the infestation and the specifics of your home. A professional pest control service can help you decide which treatment is right for you.

Remember, time is of the essence when dealing with termites. The sooner you act, the less damage they can cause. So don’t hesitate to reach out to a professional if you suspect you have termites in your home.

Preventative Measures against Drywood Termites

Prevention is always better than cure, and the same goes for dealing with drywood termites. There are several steps you can take to make your home less appealing to these destructive pests.

First, you should ensure that your home is properly sealed. This includes sealing any cracks or gaps in your walls, windows, and doors, as well as any openings in your roof or foundation. Termites can enter your home through even the smallest of openings, so it’s important to be thorough.

Second, you should keep an eye on the humidity levels in your home. Drywood termites prefer dry conditions, so keeping your home humid can help deter them. You can achieve this by using a humidifier, or by ensuring that your home is properly ventilated.

Finally, you should regularly inspect your home for signs of termites. This includes checking for frass, looking for damage to your wood, and keeping an eye out for termites themselves. Remember, early detection is key to preventing significant damage.

The Cost of Ignoring Drywood Termite Droppings

Ignoring drywood termite droppings can be a costly mistake. If left unchecked, an infestation can cause significant damage to your home, leading to expensive repair bills. In some cases, the damage can be so severe that the structure of your home is compromised, putting your safety at risk.

In addition to the financial cost, there’s also the emotional cost to consider. Dealing with a termite infestation can be stressful and time-consuming, especially if it leads to significant damage. By taking action at the first sign of trouble, you can save yourself a lot of hassle down the line.

Remember, termites won’t go away on their own. They will continue to eat and reproduce until they’re stopped, causing more and more damage as time goes on. So if you find drywood termite droppings in your home, don’t ignore them. Take action as soon as possible to protect your home.

Conclusion

In conclusion, finding drywood termite droppings in your home is not something to be taken lightly. These small, wood-destroying insects can cause significant damage if left unchecked. If you find frass in your home, it’s important to take action as soon as possible. This might involve contacting a professional pest control service, conducting regular inspections, and taking preventative measures to deter termites.

Remember, the cost of ignoring drywood termite droppings can be high, both financially and emotionally. By acting quickly and decisively, you can protect your home and save yourself a lot of hassle.

Worried about drywood termites in your Omaha or Lincoln home? Recon Pest Services can help. Reach out today to get a free consultation, and start living termite free today!

Recon CTAs 1200x200 Termites

Say Goodbye to Ants: How to Get Rid of Ants in Yards

Get rid of ants in yards

Ants are a common nuisance that can quickly invade your yard, causing annoyance and potential damage. Understanding how to get rid of ants in yards is essential to maintain a clean and pest-free outdoor space. These tiny creatures have a remarkable ability to build colonies, and once they establish a presence, it can be challenging to eradicate them completely. However, with the right knowledge and approaches, you can effectively eliminate ants from your yard and prevent future infestations.

Understanding the Behavior and Habits of Ants

To effectively combat an ant infestation, it is crucial to understand their behavior and habits. Ants are social insects that live in colonies, which can range in size from a few dozen to several thousand individuals. They have a well-defined caste system, with different roles for workers, soldiers, and the queen. Worker ants are the ones you often encounter in your yard, as they forage for food and water. They leave behind scent trails that help guide other ants to the source of nourishment.

Ants are attracted to various food sources, including sugary substances, crumbs, and even small insects. They are also attracted to moisture, making your yard an ideal habitat for them. By understanding their behavior, you can identify the areas in your yard that are most susceptible to ant infestations and take appropriate measures to prevent their presence.

Common Signs of Ant Infestations in Yards

Identifying the signs of ant infestations in your yard is the first step in getting rid of them. Look out for the following indications:

  1. Ant Trails: Observe the movement of ants in your yard. If you notice a steady stream of ants moving in a line, it is a clear sign of an infestation.
  2. Ant Nests: Ants often build nests in soil, under rocks, or in decaying wood. Keep an eye out for small piles of excavated soil or wood shavings, as they could be indications of ant nests.
  3. Ant Mounds: Some ant species create visible mounds on the surface of your yard. These mounds can vary in size and shape, depending on the species.
  4. Damage to Plants: Certain ant species, such as carpenter ants, can cause damage to wooden structures and plants. Look for signs of wood shavings or plants with hollowed-out sections.

By recognizing these signs, you can take prompt action to eliminate the ants from your yard and prevent further damage.

Natural Methods to Get Rid of Ants in Yards

If you prefer to use natural methods to get rid of ants in your yard, several options are available to you. These methods are environmentally friendly and safe for your family and pets:

  1. Vinegar Solution: Create a mixture of equal parts vinegar and water and spray it directly on ant trails, nests, and entry points. The strong smell of vinegar disrupts the ants’ scent trails and deters them from returning.
  2. Diatomaceous Earth: Sprinkle food-grade diatomaceous earth around ant nests and entry points. The microscopic particles of diatomaceous earth scratch the ants’ exoskeleton, causing them to dehydrate and die.
  3. Cinnamon: Sprinkle ground cinnamon around areas prone to ant infestations. Ants dislike the strong scent of cinnamon and will avoid crossing it.

These natural methods are effective for controlling small ant infestations. However, for severe or persistent infestations, you may need to consider chemical methods.

Chemical Methods to Eliminate Ants in Yards

Chemical methods can be highly effective in eliminating ants from your yard. However, it is important to follow the instructions carefully and consider the potential impact on the environment. Here are a few commonly used chemical methods:

  1. Ant Baits: Place ant baits near ant trails and nests. These baits contain a slow-acting poison that ants carry back to the colony, effectively eliminating the entire population.
  2. Insecticidal Sprays: Use insecticidal sprays specifically formulated for outdoor use. Spray these products directly on ant trails, nests, and entry points to kill ants on contact.
  3. Granular Insecticides: Apply granular insecticides around the perimeter of your yard to create a barrier that repels ants. These products are long-lasting and provide extended protection against ant infestations.

Remember to read and follow the instructions on chemical products carefully to ensure safe and effective use.

Preventive Measures to Avoid Future Ant Infestations in Yards

Preventing future ant infestations in your yard is crucial to maintain an ant-free environment. Here are some preventive measures you can take:

  1. Keep Your Yard Clean: Regularly clean up outdoor eating areas, remove fallen fruits and nuts, and promptly dispose of trash. By eliminating food sources, you make your yard less attractive to ants.
  2. Seal Entry Points: Inspect your yard for cracks, gaps, and openings where ants can enter. Seal these entry points with caulk or weatherstripping to prevent ants from infiltrating your yard.
  3. Trim Vegetation: Keep shrubs, trees, and other vegetation trimmed and away from your house. Overhanging branches can serve as bridges for ants to access your yard and home.

By implementing these preventive measures, you can significantly reduce the chances of future ant infestations in your yard.

Hiring Professional Pest Control Services for Severe Ant Infestations

In cases of severe ant infestations that cannot be effectively controlled through DIY methods, it may be necessary to hire professional pest control services. Pest control professionals have the expertise, experience, and tools to eliminate ants from your yard safely and efficiently. They can assess the severity of the infestation, identify the ant species, and customize a treatment plan to fit your specific needs.

Conclusion and Final Tips for Ant-Free Yards

Getting rid of ants in your yard can be a challenging task, but with the right knowledge and strategies, it is achievable. By understanding the behavior and habits of ants, identifying signs of infestations, and implementing natural or chemical methods, you can effectively eliminate ants from your yard. Remember to take preventive measures to avoid future infestations and consider professional pest control services for severe cases. With these steps, you can enjoy an ant-free yard and maintain a clean and pest-free outdoor space.

Recon Pest Services is here to help you keep ants out of your yard year-round. Contact us and get your Omaha or Lincoln home ant-free today!

Recon CTAs 1200x200 Ants

Epsom Salt for Mosquito Bites: Does it Work?

epsom salt for mosquito bites

Mosquito bites are not only annoying but can also be quite painful and itchy. Whether you’re spending time outdoors or simply relaxing in your backyard, these pesky insects can quickly ruin your day. That’s why finding effective remedies for mosquito bites is essential. One popular remedy that many people swear by is Epsom salt for mosquito bites. But does it actually work?

What is Epsom salt, and what is it made of?

Epsom salt, also known as magnesium sulfate, is a mineral compound that has been used for centuries for its various health benefits. It is composed of magnesium, sulfur, and oxygen. Epsom salt is commonly used in bath salts, foot soaks, and as a natural exfoliant for the skin. It is believed to have anti-inflammatory properties and can help ease muscle aches and pains.

Can Epsom salt help with mosquito bites?

Many people believe that Epsom salt can help alleviate the discomfort caused by mosquito bites. The theory is that the magnesium sulfate in Epsom salt can reduce inflammation and swelling, which in turn can relieve itching and pain. However, there is limited scientific evidence to support this claim. While some individuals may find relief from using Epsom salt for mosquito bites, it may not work for everyone.

How does Epsom salt work on mosquito bites?

When applied to mosquito bites, Epsom salt is thought to draw out toxins and reduce inflammation. The salt crystals dissolve in water and create a solution that can be applied to the affected area. The magnesium sulfate in the solution is believed to have a calming effect on the skin, which can help reduce itching and irritation. It is important to note that Epsom salt should not be applied directly to open wounds or broken skin.

Applying Epsom salt for mosquito bites

To use Epsom salt for mosquito bites, start by dissolving a tablespoon of Epsom salt in a cup of warm water. Stir until the salt crystals are completely dissolved. Then, soak a clean cloth or cotton ball in the solution and gently apply it to the mosquito bites. Leave the solution on for a few minutes before rinsing it off with cool water. You can repeat this process several times a day as needed.

Other natural remedies for mosquito bites

If Epsom salt doesn’t provide the relief you’re looking for, there are several other natural remedies you can try. Applying a cold compress to the affected area can help reduce swelling and numb the skin, providing temporary relief. Aloe vera gel is another popular remedy that can soothe itching and promote healing. Tea tree oil, lavender oil, and witch hazel are also known for their anti-inflammatory properties and can be applied topically to mosquito bites.

Precautions and considerations when using Epsom salt for mosquito bites

While Epsom salt is generally considered safe, there are a few precautions to keep in mind. If you have sensitive skin or are prone to allergic reactions, it’s best to test a small area of skin before applying Epsom salt to a larger area. If you experience any redness, itching, or irritation, discontinue use immediately. It’s also important to remember that Epsom salt is not a substitute for medical treatment. If you have severe mosquito bites or an allergic reaction, it’s best to consult with a healthcare professional.

Epsom salt for mosquito bites: User experiences and reviews

Many individuals have reported positive experiences with using Epsom salt for mosquito bites. They claim that it helps reduce swelling, itching, and discomfort. However, it’s important to note that everyone’s body is different, and what works for one person may not work for another. It’s always a good idea to consult with a healthcare professional before trying any new remedy, especially if you have underlying health conditions or are taking medication.

Conclusion: Is Epsom salt effective for mosquito bites?

In conclusion, while there is limited scientific evidence to support the use of Epsom salt for mosquito bites, many individuals have found relief from using it. The magnesium sulfate in Epsom salt is believed to have anti-inflammatory properties that can help reduce swelling and itching. However, it’s important to remember that what works for one person may not work for another. If you’re suffering from severe mosquito bites or are experiencing an allergic reaction, it’s best to seek medical advice. And remember, prevention is key when it comes to mosquito bites. Use mosquito repellents, wear protective clothing, and eliminate standing water to reduce your risk of being bitten.

Recon CTAs 1200x200 Mosquito

How to Get Rid of Roach Nests in Stoves: 5 Proven Tips

Roach Nests in Stoves

Understanding roach nests in stoves

Roach nests in stoves can be a real nuisance. Understanding why these pests choose to make their nests in your stove is the first step in getting rid of them. Roaches are attracted to warm and dark places, making stoves the perfect hiding spot for them. The heat from the stove provides them with the ideal environment to breed and multiply. Roaches can easily access your stove through small cracks and crevices, and once they establish a nest, it can be challenging to get rid of them.

Why roach nests in stoves are a problem

Having roach nests in your stove is not only unsanitary but also poses a health risk. Roaches carry bacteria and pathogens that can contaminate your food and utensils. Their droppings and shed skin can trigger allergies and asthma symptoms, especially in children and those with respiratory conditions. Additionally, roaches can cause damage to your stove’s electrical wiring and insulation, leading to potential fire hazards. It is crucial to address this problem promptly to protect your health and ensure the safety of your home.

Signs of a roach nest in your stove

Identifying the signs of a roach nest in your stove is essential for effective pest control. Some common indicators include:

  1. Unpleasant odor: Roaches emit a distinct musty odor that can be quite noticeable, especially when they are present in large numbers. If you detect an unusual smell coming from your stove, it could be a sign of a roach infestation.
  2. Droppings: Roach droppings resemble small black or brown specks and can often be found near the burners or inside the stove. If you spot these droppings, it is a clear sign that roaches have made themselves at home in your stove.
  3. Egg casings: Roaches lay their eggs in protected areas, and your stove can provide the perfect hiding spot. Look for small, oval-shaped egg casings near the burners or in the corners of your stove. These casings are usually brown or tan in color.

If you notice any of these signs, it is crucial to take immediate action to eliminate the roach nest and prevent further infestation.

Safety precautions before dealing with roach nests

Before you start tackling the roach nest in your stove, it is essential to take some safety precautions to protect yourself and your home. Here are a few steps you should follow:

  1. Wear protective clothing: Put on gloves, a mask, and long sleeves to avoid direct contact with roaches and their droppings. This will help prevent any potential allergic reactions or the spread of bacteria.
  2. Ensure proper ventilation: Open windows and turn on fans to ensure proper ventilation while dealing with roach nests. This will help dissipate any chemical odors and keep the air fresh.
  3. Keep children and pets away: Remove children and pets from the area to prevent them from coming into contact with any chemicals or roaches during the treatment process.

By taking these safety precautions, you can ensure a safe and effective approach to eliminating roach nests from your stove.

Proven tips to get rid of roach nests in stoves

Now that you understand the problem and have taken necessary safety measures, let’s explore five proven tips to get rid of roach nests in stoves.

Tip 1: Deep cleaning your stove

The first step in eliminating roach nests from your stove is a thorough deep cleaning. Start by removing all the burner grates, drip pans, and control knobs. Soak them in warm, soapy water and scrub them clean. Use a brush to clean the interior of the stove, paying special attention to the areas near the burners and crevices. Vacuum any debris or roach droppings you find. After cleaning, sanitize the stove with a mixture of vinegar and water to kill any remaining bacteria or odors. Make sure to dry the stove thoroughly before reassembling the parts.

Tip 2: Applying natural repellents

Natural repellents can be an effective way to deter roaches from nesting in your stove. Peppermint oil, bay leaves, and cucumber slices are all known to repel roaches. Soak cotton balls in peppermint oil and place them near the stove’s burners or in areas where roaches are likely to hide. Scatter bay leaves around the stove and place cucumber slices near the cracks and crevices. These natural repellents can help discourage roaches from making your stove their home.

Tip 3: Using roach baits and traps

Roach baits and traps are an excellent way to eliminate the roach nest in your stove. Place bait stations near the stove, focusing on areas where roaches are likely to gather. These bait stations contain a slow-acting poison that roaches carry back to their nest, effectively eliminating the entire colony. Additionally, sticky traps can be placed near the stove to catch any roaches that venture out. Regularly check and replace the baits and traps until the infestation is completely eradicated.

Tip 4: Calling professional pest control

If the infestation persists or if you are dealing with a severe roach nest in your stove, it may be best to call in professional pest control services. Experienced exterminators have the knowledge and tools to effectively eliminate roach nests and prevent future infestations. They can assess the extent of the problem, identify entry points, and provide targeted treatments to eliminate roaches from your stove. Professional pest control ensures a thorough and long-lasting solution to your roach problem.

Tip 5: Regular maintenance and cleaning

Prevention is key when it comes to roach nests in stoves. Regular maintenance and cleaning can help keep these pests at bay. Clean your stove regularly, paying attention to spills, crumbs, and grease buildup. Store food in airtight containers and promptly clean up any spills or crumbs in your kitchen. Seal any cracks or crevices around your stove to prevent roaches from entering. By maintaining a clean and hygienic kitchen, you can significantly reduce the chances of roaches nesting in your stove.

Conclusion

Dealing with roach nests in your stove can be a challenging task, but with the right approach, it is possible to eliminate these pests and prevent future infestations. By understanding the reasons behind roach nests, identifying the signs, and following the proven tips provided, you can regain control of your stove and ensure a roach-free environment. Remember, if the infestation persists or if you need professional assistance, don’t hesitate to reach out to Recon Pest Services. Contact us today for a free quote and take the first step towards a roach-free home!

Recon CTAs 1200x200 Roaches

Rodent Droppings Clean Up: 6 Steps for Cleaning Droppings

Rodent droppings clean up

Rodent infestations can be a major headache for homeowners. Apart from the damage they can cause to your property, rodents also leave behind droppings that pose health risks. In this article, we will discuss the importance of proper rodent droppings clean up and provide you with six valuable tips to ensure a thorough and safe sanitization process.

The Dangers of Rodent Droppings

Rodent droppings can contain harmful bacteria, viruses, and parasites that can cause serious illnesses. Hantavirus, salmonella, and leptospirosis are just a few examples of the diseases that can be transmitted through rodent droppings. These health risks make it crucial to promptly and effectively clean up any areas affected by rodent infestations.

Why Proper Rodent Droppings Clean Up is Important

Ignoring rodent droppings or attempting to clean them up without the right knowledge and precautions can lead to the spread of harmful pathogens. Breathing in particles from dried rodent droppings or inadvertently ingesting them can result in severe health complications. Therefore, it is vital to understand the significance of proper rodent droppings clean up to protect yourself and your family from potential health hazards.

Personal Protective Equipment for Rodent Droppings Clean Up

Before embarking on the clean-up process, it is essential to equip yourself with the appropriate personal protective equipment (PPE). This includes wearing disposable gloves, a respirator mask, safety goggles, and protective clothing. PPE acts as a barrier between you and the hazardous substances present in rodent droppings, reducing the risk of contamination.

It is also crucial to ensure that you have a designated area for donning and removing your PPE. This helps prevent cross-contamination and ensures that you do not carry any potentially harmful substances outside of the affected area.

Step-by-Step Guide to Cleaning Up Rodent Droppings

Cleaning up rodent droppings requires a systematic approach to ensure a thorough and effective sanitization process. Here is a step-by-step guide to help you navigate the clean-up process:

Step 1: Preparation

  • Seal off the affected area to prevent the spread of contaminants to other parts of your home.
  • Open windows and doors to improve ventilation.

Step 2: Wet Cleaning

  • Dampen the affected area with a disinfectant solution or a mixture of bleach and water. This helps to minimize the release of airborne particles.
  • Use disposable towels or rags to carefully remove the droppings, ensuring that you do not scatter or spread them further.
  • Place the droppings and cleaning materials in a sealed bag.

Step 3: Vacuuming

  • Use a vacuum cleaner with a HEPA filter to thoroughly clean the area, including floors, carpets, and furniture.
  • Avoid using a vacuum cleaner without a HEPA filter, as it can release particles back into the air.

Step 4: Disposal

  • Double bag all the waste materials in heavy-duty garbage bags.
  • Dispose of the bags in accordance with local regulations and guidelines.

Step 5: Disinfection

  • Apply a disinfectant solution to the affected area, following the instructions on the product label.
  • Allow the disinfectant to sit for the recommended duration to effectively kill any remaining bacteria or viruses.

Step 6: Final Cleaning

  • Clean all tools and equipment used in the process thoroughly.
  • Wash your hands and remove your PPE properly, following the designated procedure.

Disinfecting and Sanitizing Rodent-Infested Areas

Sanitizing rodent-infested areas is crucial to prevent the spread of diseases and to eliminate any residual odor that may attract rodents in the future. After completing the cleaning process, it is essential to apply a disinfectant specifically designed for rodent infestations. This will help eliminate any remaining bacteria or viruses that may still be present.

When choosing a disinfectant, opt for one that is effective against a wide range of pathogens and is safe to use in residential settings. Follow the instructions provided by the manufacturer carefully, ensuring proper dilution and adequate contact time for the disinfectant to work effectively.

Preventing Future Rodent Infestations

Once you have successfully cleaned up rodent droppings, it is vital to take preventive measures to avoid future infestations. Here are a few tips to help keep rodents at bay:

  • Seal any gaps or cracks in your home’s exterior to prevent rodents from entering.
  • Keep your home clean and free of food debris that may attract rodents.
  • Store food in tightly sealed containers and keep garbage in tightly closed bins.
  • Trim trees and shrubs near your home to eliminate potential access points for rodents.
  • Regularly inspect your home for signs of rodent activity and take immediate action if necessary.

Hiring Professional Rodent Droppings Clean Up Services

Cleaning up rodent droppings can be a challenging and potentially hazardous task. If you are uncomfortable or unsure about handling the clean-up process yourself, it is advisable to hire professional rodent droppings clean-up services. These professionals have the expertise, equipment, and knowledge to ensure a thorough and safe sanitization process.

Common Mistakes to Avoid During Rodent Droppings Clean Up

During the clean-up process, it is important to be aware of common mistakes that can compromise your safety and the effectiveness of the cleaning. Avoid the following:

  • Using a broom or vacuum cleaner without a HEPA filter, as it can release airborne particles.
  • Neglecting to wear proper personal protective equipment, increasing the risk of contamination.
  • Failing to seal off the affected area, leading to the spread of contaminants.
  • Improper disposal of waste materials, which can result in further infestations.

Environmental Considerations When Cleaning Up Rodent Droppings

When cleaning up rodent droppings, it is crucial to consider the environmental impact of the products and methods you use. Opt for environmentally friendly disinfectants and cleaning solutions that do not harm the ecosystem. Additionally, ensure proper disposal of waste materials according to local regulations to prevent environmental contamination.

Conclusion

Proper rodent droppings clean up is essential for protecting yourself and your family from the health risks associated with rodent infestations. By following the tips provided in this article, you can ensure a thorough and safe sanitization process. Remember, if you are uncomfortable with the clean-up process or unsure about handling it yourself, it is always best to seek professional assistance. Take the necessary steps to prevent future rodent infestations and enjoy a rodent-free home.

Recon Pest Services is the greater Omaha & Lincoln area’s top pest control solution. Contact us today to get a free quote, and start living rodent free today!

Recon CTAs 1200x200 Rodents

Discover the Surprising Similarities: Beetle Bugs That Look Like Roaches

Beetle bugs that look like roaches

Beetles and roaches share your living space more often than you might realize. These tiny creatures, often disregarded, play vital roles in the ecosystem. Beetles, with a population of over 400,000 species, are the most diverse group of organisms on planet Earth. Roaches, on the other hand, are a group of about 4,600 species, each with its own unique characteristics. Although they’re quite different in many ways, there are some surprising similarities between the two, especially when it comes to certain beetles that look like roaches.

Both beetles and roaches belong to the insect family. Beetles are part of the Coleoptera order, while roaches fall under the Blattodea order. Despite their shared insect lineage, they have unique characteristics that set them apart. Yet, their similarities can often lead to confusion, making it hard to distinguish one from the other. This is particularly true for those beetle bugs that bear a striking resemblance to roaches.

In this article, you’ll learn about the physical characteristics of these creatures, their surprising similarities, and how to differentiate between the two. This knowledge can prove particularly useful when trying to eliminate a pest problem in your home, as different species require different control measures.

Understanding the Physical Characteristics of Beetles

Beetle are fascinating creatures. They come in a myriad of shapes, sizes, and colors, each species unique in its own way. Nonetheless, most beetles share a set of common physical characteristics.

Firstly, all beetles have a hard exoskeleton made of chitin that provides protection and structural support. This exoskeleton is divided into two primary parts: the forewings (elytra) and the hind wings. The elytra are hard and shell-like, often covering the softer hind wings that are used for flight. This is a distinguishing feature that sets beetles apart from other insects.

Secondly, beetles have a well-defined head, thorax, and abdomen. The head houses the eyes, antennae, and mouthparts designed for chewing. The antennae vary greatly among beetle species, ranging from threadlike to feathery, and are often used to identify different species. The thorax, or middle section, is where the legs and wings attach, while the abdomen contains the beetle’s digestive and reproductive organs.

Beetles are also known for their striking colors and patterns, often used as a form of camouflage or a means to ward off predators.

Understanding the Physical Characteristics of Roaches

Roaches, on the other hand, are often met with disdain due to their association with filth and disease. However, these insects are survivors, having existed for over 320 million years.

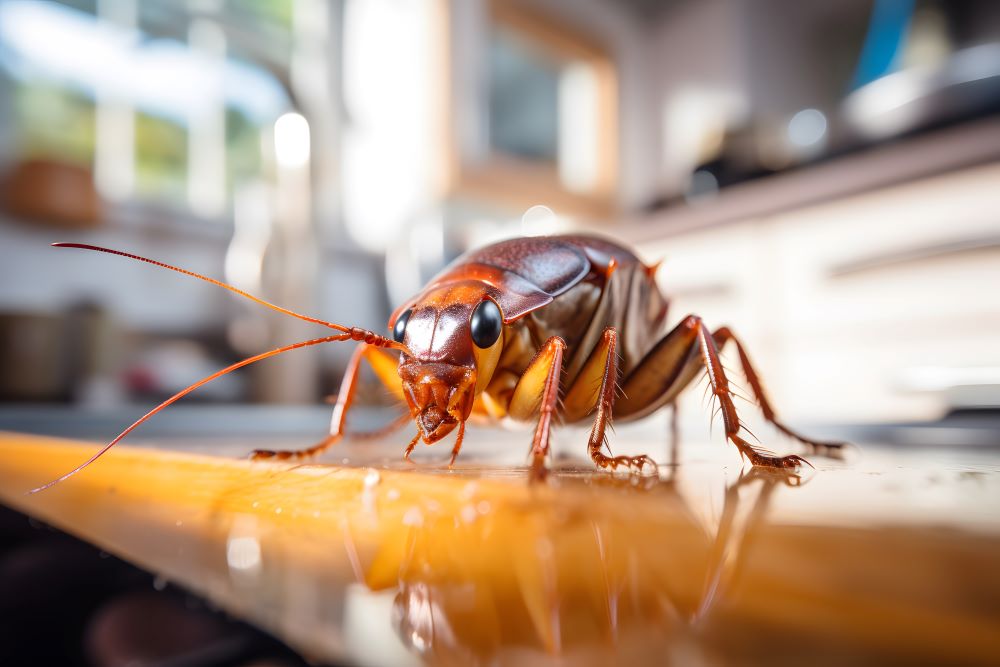
Roaches are generally medium to large-sized insects. They have a flat, oval-shaped body with a small head that’s often concealed by a shield-like pronotum. Unlike beetles, roaches have a soft, leathery exoskeleton.

Roaches have long, spiny legs designed for speed, which is why they’re notoriously hard to catch. They also have two pairs of wings, with the forewings being tougher and more protective than the hind wings. However, not all roaches use their wings to fly.

One of the defining characteristics of roaches is their long, whip-like antennae. These antennae are used for navigation and detecting food. Roaches are also known for their rapid breeding rate, making them a major pest issue when they infest homes.

Surprising Similarities: Beetle Bugs That Look Like Roaches

Despite the physical differences, certain species of beetles bear a striking resemblance to roaches. These beetle bugs that look like roaches can easily be mistaken for one another due to their similar size, color, and shape.

Both beetles and roaches have flattened bodies, making it easy for them to squeeze into tight spaces. Their body colors often range from brown to black, providing excellent camouflage in their natural environments. They are both nocturnal creatures, preferring to come out at night, which is often when you might spot them in your home.

Another surprising similarity is that both beetles and roaches have wings. Although not all species use them to fly, the presence of wings can often lead to confusion. Certain species of beetles, like the ground beetles and the June bugs, closely resemble roaches due to their size, color, and wing structure.

Common Types of Beetle Bugs That Look Like Roaches

Certain species of beetles are often mistaken for roaches due to their striking resemblance. Ground beetles, for instance, have a similar body shape and color to roaches. They’re nocturnal and are often found in the same damp, dark habitats as roaches.

June bugs, also known as June beetles, are another species that closely resembles roaches. They have a similar size and color, with a hard exoskeleton that might be mistaken for the roach’s leathery body.

The oriental beetle is another species that looks remarkably like a roach. Its dark, shiny body and habit of scurrying away when disturbed can make you mistake it for a roach.

How to Differentiate Between Beetle Bugs and Roaches

Despite their similarities, there are key differences between beetle bugs and roaches that can help you tell them apart.

Beetles have hard, shell-like forewings that cover their back, while roaches have leathery wings that lay flat on their body. Beetles also have antennae that vary widely in shape and size, while roaches have long, whip-like antennae.

Another significant difference is the shape of their bodies. Roaches have a flat, oval shape and are usually larger, while beetles have a more rounded shape.

Their behavior also differs. Beetles are usually not considered pests and most species do not infest homes. Roaches, on the other hand, are notorious for their infestations and are often found in kitchens and bathrooms in search of food and water.

Prevention and Control Measures for Beetles and Roaches

Prevention is the best measure when it comes to pests. Regular cleaning, sealing off entry points, and proper food storage can help keep both beetles and roaches at bay.

However, if you’re dealing with an infestation, it’s important to correctly identify the pest for effective control. Roach infestations require professional pest control services due to their rapid breeding rate and resistance to over-the-counter pesticides.

Beetles, on the other hand, can often be controlled through simple measures like removing the source of attraction and using insecticides.

Remember, the key to effective pest control is correct identification.

Conclusion

Beetle bugs and roaches are fascinating creatures, each with unique characteristics. While they share some surprising similarities, there are key differences that set them apart. Understanding these differences can help in effective pest control.

Recon Pest Services is your one-stop-shop for beetle and roach control in the Omaha and Lincoln areas. Contact us today for a free quote, and start living roach free today!

Recon CTAs 1200x200 Roaches

Can LED Lights Attract Silverfish? Find Out the Truth

Can LED Lights Attract Silverfish?

Introduction to Silverfish and LED Lights

You’ve probably noticed the eerie, silvery creatures that dart around your home at night. They’re called silverfish, and they’ve sparked a lot of debate recently, particularly in relation to LED lights. But what exactly are silverfish? And can LED lights attract silverfish? In this blog post, we’ll delve into these intricate questions and provide you with a comprehensive understanding of these peculiar creatures and their association with LED lights.

What are Silverfish?

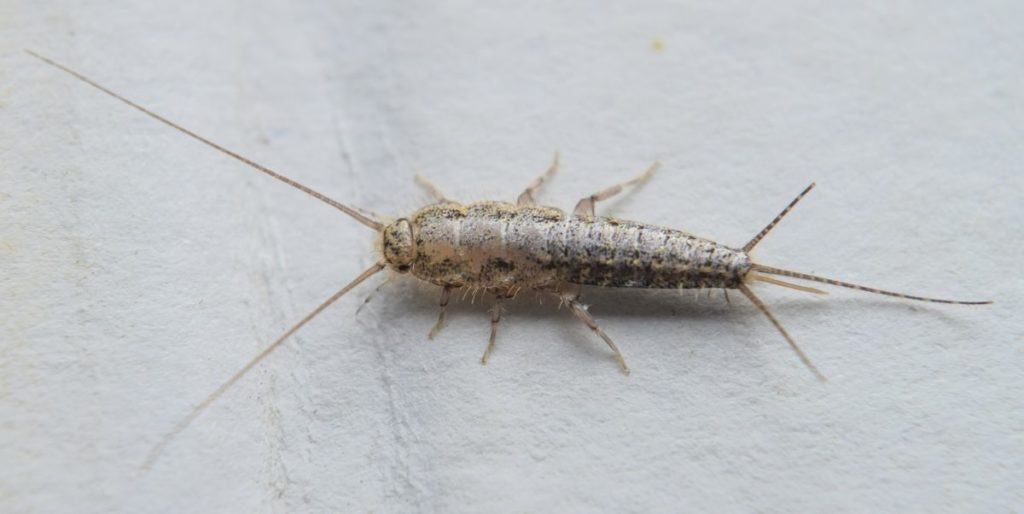
Silverfish, scientifically known as Lepisma saccharina, are small, wingless insects that have a fish-like appearance due to their silvery scales and wiggling movements. They’re nocturnal creatures, meaning they’re most active at night. You might find them lurking in your bathrooms, kitchens, or basements, as they thrive in dark, damp areas.

The Attraction of Insects to Light: An Overview

Insects’ attraction to light is a well-known phenomenon, commonly referred to as phototaxis. However, the reasons behind this attraction vary greatly among different insect species. Some insects use light sources as navigational aids, while others are lured by the warmth that these lights provide. Nevertheless, it’s important to note that not all insects exhibit phototaxis.

Do LED Lights Attract Silverfish?

So, does led lights attracts silverfish? The answer might surprise you. Contrary to popular belief, silverfish aren’t particularly attracted to light, including LED lights. They’re creatures of darkness and prefer to stay hidden in the dark corners of your home. They’re more likely to scurry away when you turn on a light than they are to be lured by it.

Scientific Evidence: Can LED Lights Attract Silverfish?

Scientific studies lend further weight to this claim. A number of studies have shown that silverfish show no positive phototaxis. In fact, they tend to exhibit negative phototaxis, meaning they’re more likely to be repelled by light than attracted to it. Therefore, if you’ve noticed an increase in silverfish activity around your LED lights, it’s likely due to other factors.

Factors That Attract Silverfish to Your Home

Silverfish are primarily attracted to moist, humid environments, and they feed on a wide variety of substances, including paper, glue, cotton, linen, and even dead insects. If your home offers these conditions and resources, it might be inadvertently inviting silverfish.

How to Prevent Silverfish Infestation

The key to preventing silverfish infestations is by making your home less attractive to them. This can be achieved by reducing moisture levels, sealing off potential entry points, and removing their food sources. Regular cleaning and vacuuming can also help to keep these pesky insects at bay.

Professional Pest Control for Silverfish Infestations

If you’re facing a serious silverfish infestation and DIY methods aren’t cutting it, it’s time to call in the professionals. Recon Pest Services is your one-stop-shop for silverfish control in the Omaha and Lincoln areas. Contact us today for a free quote, and start living silverfish free today!

Conclusion: Can LED Lights Attract Silverfish?

In conclusion, while LED lights might attract some insects, silverfish aren’t among them. They prefer the darkness and are more likely to be repelled by light. So, if you’ve been worried about your LED lights attracting silverfish, you can put those fears to rest. Remember, the key to a silverfish-free home is maintaining a dry, clean environment and seeking professional help when needed.

Recon CTAs 1200x200 General

Spider Bites vs Mosquito Bites: Unveiling the Key Differences

Spider bites vs mosquito bites

When it comes to insect bites, one of the most common questions that arises is the difference between a spider bite and a mosquito bite. While both can cause discomfort and irritation, it’s important to understand the key differences between the two. In this article, we will explore the anatomy, symptoms, treatment options, and prevention tips for spider bites and mosquito bites. By the end, you will be able to identify and differentiate between spider bites vs mosquito bites and take the necessary steps to protect yourself and your loved ones.

Anatomy of a Spider Bite

Spider bites occur when a spider injects venom into the skin. The anatomy of a spider bite consists of two main components: the fangs and the venom. Spiders have two fangs that they use to inject venom into their prey. When a spider bites a human, these fangs can pierce the skin, causing a small puncture wound. The venom then enters the bloodstream through this wound, leading to various symptoms and reactions.

Symptoms and Characteristics of a Spider Bite

The symptoms and characteristics of a spider bite can vary depending on the species of spider and the individual’s reaction to the venom. Common symptoms include redness, swelling, pain, and itching at the site of the bite. Some individuals may also experience systemic symptoms such as fever, headache, muscle pain, and nausea. In severe cases, certain spider bites can lead to tissue necrosis or even life-threatening complications.

Common Types of Spiders that Bite

There are several types of spiders that are known to bite humans. The most common ones include the black widow spider and the brown recluse spider. Black widow spider bites often result in a red, swollen area with two puncture marks. The bite may initially go unnoticed but can progress to severe pain and muscle spasms. Brown recluse spider bites, on the other hand, may cause a red, blistered area that eventually turns into a deep, open sore.

Treatment Options for Spider Bites

If you suspect you have been bitten by a spider, it is important to seek medical attention. Treatment options for spider bites will depend on the severity of the symptoms and the type of spider involved. In some cases, over-the-counter pain relievers, antihistamines, and topical corticosteroids may be recommended to alleviate discomfort and reduce inflammation. For more severe cases, antivenom or other medical interventions may be necessary.

Anatomy of a Mosquito Bite

Mosquito bites are caused by female mosquitoes feeding on human blood. The anatomy of a mosquito bite consists of the mosquito’s mouthparts, which include a proboscis. The proboscis is a long, needle-like structure that the mosquito uses to pierce the skin and extract blood. Unlike spider bites, mosquito bites do not involve venom injection into the skin.

Symptoms and Characteristics of a Mosquito Bite

Mosquito bites typically result in small, itchy, red bumps on the skin. The itching sensation is caused by the mosquito’s saliva, which contains anticoagulant proteins that prevent blood from clotting. In some individuals, mosquito bites can lead to more severe reactions such as large welts, blisters, or even allergic reactions. Additionally, mosquitoes are known carriers of diseases such as malaria, dengue fever, and Zika virus, which can further complicate the symptoms.

Common Types of Mosquitoes that Bite

There are numerous species of mosquitoes worldwide, but some are more likely to bite humans than others. The Aedes mosquito, for example, is known to transmit diseases such as dengue fever and Zika virus. The Anopheles mosquito is responsible for malaria transmission. Understanding the types of mosquitoes in your area can help you take appropriate precautions to avoid bites and reduce the risk of disease transmission.

Treatment Options for Mosquito Bites

For most people, treatment for mosquito bites involves relieving the itching and discomfort. Over-the-counter topical creams or lotions containing ingredients like calamine, hydrocortisone, or antihistamines can help reduce itching and inflammation. Applying a cold compress or taking an oral antihistamine may also provide relief. However, if you experience severe symptoms or suspect you may have contracted a mosquito-borne illness, it is important to seek medical attention promptly.

Key Differences between Spider Bites and Mosquito Bites

While both spider bites and mosquito bites can cause itching and discomfort, there are several key differences between the two. Spider bites often result in a puncture wound with localized symptoms such as pain, redness, and swelling. In some cases, there may be systemic symptoms or severe complications. On the other hand, mosquito bites are characterized by itchy red bumps and may be associated with allergic reactions or the transmission of diseases. Understanding these differences can help you identify the source of the bite and determine the appropriate course of action.

How to Identify and Differentiate between a Spider Bite and a Mosquito Bite

Differentiating between a spider bite and a mosquito bite can sometimes be challenging, especially if you didn’t witness the actual bite. However, there are a few clues that can help you identify the source. Spider bites often leave two puncture marks close together, resembling fang marks. The bite may also be accompanied by localized symptoms such as intense pain or muscle spasms. Mosquito bites, on the other hand, typically appear as raised, itchy bumps with no discernible puncture marks.

Prevention Tips for Spider Bites vs Mosquito Bites

Preventing spider bites and mosquito bites is key to avoiding the discomfort and potential health risks associated with these bites. To prevent spider bites, it is important to keep your home clean and clutter-free, seal any cracks or openings, and use spider repellents if necessary. To prevent mosquito bites, wear long sleeves and pants, use insect repellents containing DEET, and eliminate standing water sources where mosquitoes breed. Additionally, consider installing screens on windows and doors to keep mosquitoes out of your living space.

Conclusion

In conclusion, understanding the differences between spider bites and mosquito bites is crucial for proper identification and treatment. While spider bites involve venom injection and can lead to various symptoms and complications, mosquito bites are primarily itchy and can transmit diseases. By being aware of the anatomy, symptoms, treatment options, and prevention tips for both types of bites, you can take proactive measures to protect yourself and your family. If you require professional pest control services to keep your home free from spiders and mosquitoes, contact Recon Pest Services today for a free quote. Don’t let these pesky insects disrupt your peace of mind any longer – start living pest-free today!

Recon CTAs 1200x200 Mosquito

Say Goodbye to Bites: Natural Remedies for Ant Bites

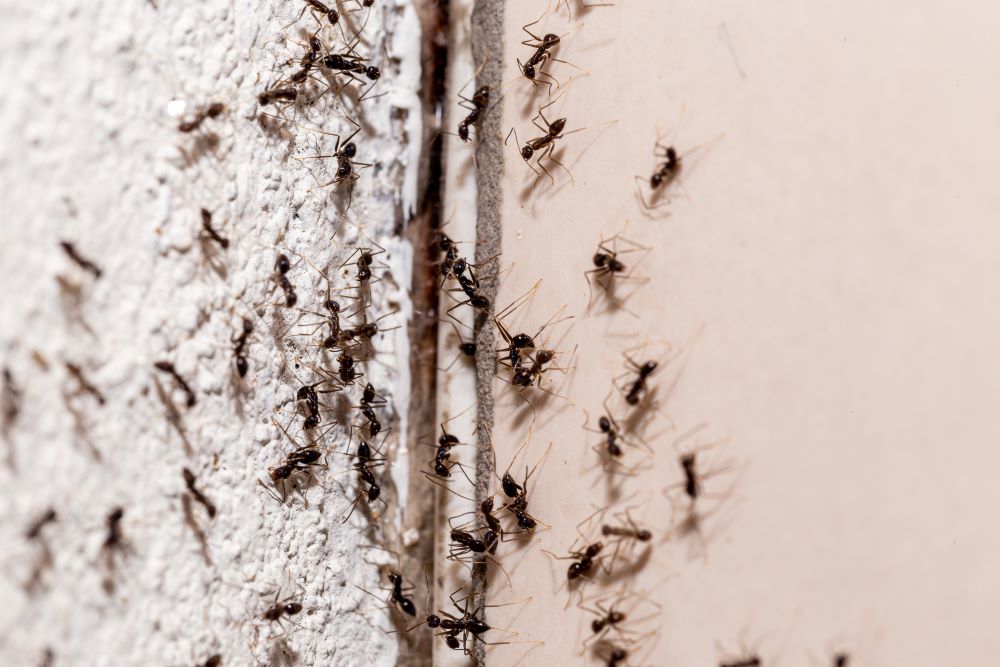
Ants in Walls

Ants are tiny creatures that can cause big problems when they bite you. Ant bites can be painful and uncomfortable, and they can cause itching and swelling. Fortunately, there are many natural remedies you can use to relieve the symptoms of ant bites. In this article, we’ll discuss some of the most effective natural remedies for ant bites.

Introduction to Ant Bites

Ant bites occur when ants feel threatened and defend themselves by biting. Different species of ants have different types of bites, and the severity of the bite can vary based on the type of ant. Some ants, like fire ants, have bites that can be very painful and cause severe allergic reactions in some people.

Common Symptoms of Ant Bites

The symptoms of ant bites can vary depending on the type of ant and the person’s sensitivity to the bite. Some common symptoms of ant bites include:

  • Pain or burning sensation at the site of the bite.
  • Redness and swelling.
  • Itching.
  • Small blisters or pustules.
  • Allergic reactions, including difficulty breathing.

Top Natural Remedies for Ant Bites

  1. Apple Cider Vinegar – Apple cider vinegar is a natural antiseptic that can help reduce the pain and swelling of ant bites. Simply soak a cotton ball in apple cider vinegar and apply it to the bite.
  2. Baking Soda – Baking soda is another natural remedy that can help reduce the itching and swelling of ant bites. Mix a small amount of baking soda with water to form a paste, and apply it to the bite.
  3. Ice Pack – Applying an ice pack to the bite can help reduce swelling and numb the area, which can help relieve pain. Wrap an ice pack in a towel and apply it to the bite for 10-15 minutes at a time.

Essential Oils for Ant Bites Relief

Essential oils can be effective natural remedies for ant bites relief. Here are some of the best essential oils for ant bites relief:

  1. Lavender oil – Lavender oil has anti-inflammatory properties that can help reduce swelling and relieve pain. Apply a few drops of lavender oil directly to the bite.
  2. Tea tree oil – Tea tree oil has antiseptic properties that can help prevent infection and reduce the risk of scarring. Mix a few drops of tea tree oil with a carrier oil, like coconut oil, and apply it to the bite.
  3. Peppermint oil – Peppermint oil has a cooling effect that can help relieve itching and pain. Mix a few drops of peppermint oil with a carrier oil and apply it to the bite.

Herbal Remedies for Ant Bites

Herbs can be used as natural remedies for ant bites, too. Here are some of the best herbal remedies for ant bites:

  1. Aloe Vera – Aloe vera has anti-inflammatory and antibacterial properties that can help reduce swelling and prevent infection. Apply a small amount of aloe vera gel directly to the bite.
  2. Calendula – Calendula has anti-inflammatory properties that can help reduce swelling and relieve pain. Apply a few drops of calendula oil or a calendula salve to the bite.
  3. Chamomile – Chamomile has anti-inflammatory and antiseptic properties that can help reduce swelling and prevent infection. Brew a cup of chamomile tea and apply the tea bag directly to the bite.

Home Remedies for Ant Bites

There are many home remedies for ant bites that you can use to relieve the symptoms of ant bites. Here are some of the most effective home remedies for ant bites:

  1. Saltwater – Saltwater can help reduce swelling and relieve pain. Mix a teaspoon of salt with a cup of warm water and soak a cotton ball in the solution. Apply the cotton ball to the bite.
  2. Honey – Honey has antibacterial properties that can help prevent infection and promote healing. Apply a small amount of honey to the bite and cover it with a bandage.
  3. Oatmeal – Oatmeal has anti-inflammatory properties that can help reduce swelling and relieve itching. Mix a cup of oatmeal with water to form a paste and apply it to the bite.

When to Seek Medical Attention for Ant Bites

Most ant bites can be treated with natural remedies and do not require medical attention. However, if you experience any of the following symptoms, you should seek medical attention:

  • Difficulty breathing or swallowing.
  • Swelling of the face, lips, or tongue.
  • Chest pain or tightness.
  • Dizziness or fainting.
  • Nausea or vomiting.

Conclusion

Ant bites can be painful and uncomfortable, but there are many natural remedies you can use to relieve the symptoms. Apple cider vinegar, baking soda, ice packs, essential oils, herbs, and home remedies can all be effective natural remedies for ant bites. If you experience severe symptoms or have an allergic reaction to an ant bite, seek medical attention immediately. For all of your ant removal needs in the Omaha & Lincoln areas, Recon Pest Services is here to help. Contact us today for a free quote!

Recon CTAs 1200x200 Ants
×