Choosing the Perfect Mouse Trap Box: Rodent Pest Control

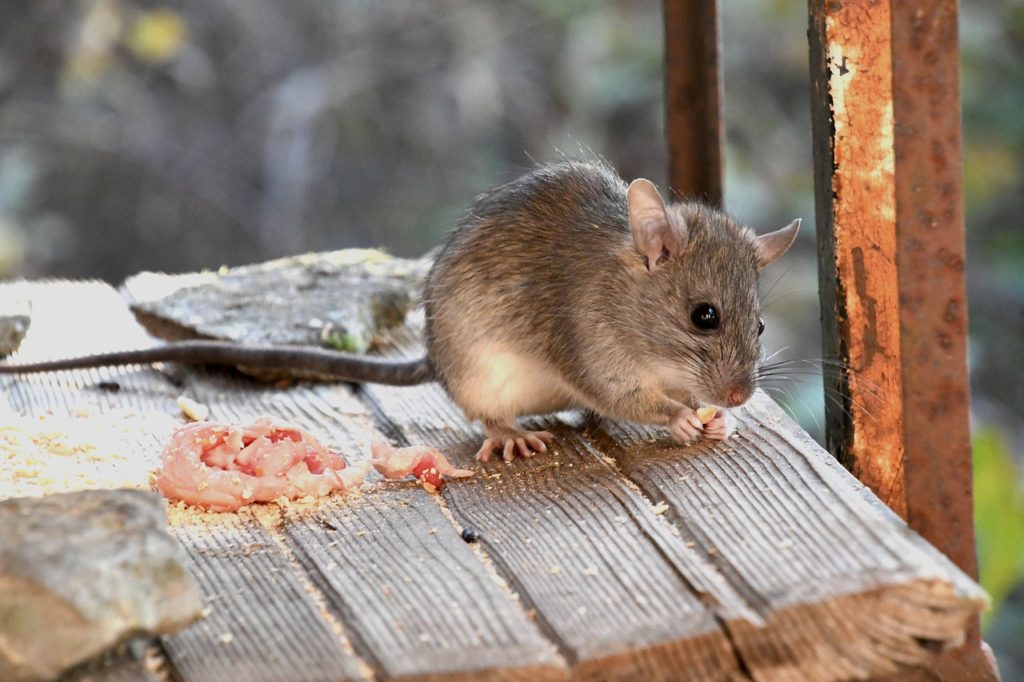
Do mice eat roaches?

As homeowners, we understand the importance of keeping our living spaces clean and free from pests. One of the most common pests that can wreak havoc on our homes is rodents, particularly mice. These small creatures can easily find their way into our homes, causing damage to our belongings and spreading diseases. That’s why it’s crucial to have an effective rodent pest control strategy in place, and one essential tool in this strategy is the mouse trap box.

Mouse trap boxes are specially designed containers that house traditional mouse traps. They serve as a protective barrier, preventing children and pets from accessing the traps while still allowing mice to enter. These boxes are made of durable materials and have small openings that mice can easily squeeze through, but larger animals cannot. By using a mouse trap box, you can ensure the safety of your loved ones while effectively controlling the rodent population in your home.

Different types of mouse trap boxes available

When it comes to choosing a mouse trap box, you’ll find that there are several options available on the market. The most common types include plastic mouse trap boxes, metal mouse trap boxes, and wooden mouse trap boxes. Each type has its own advantages and disadvantages, so it’s essential to consider your specific needs before making a decision.

Plastic mouse trap boxes are lightweight and easy to clean. They are also transparent, allowing you to easily monitor the trap and see if it has caught any mice. However, they may not be as durable as metal or wooden mouse trap boxes.

Metal mouse trap boxes, on the other hand, are incredibly sturdy and can withstand harsh weather conditions. They are also more tamper-proof, making them ideal for outdoor use. However, they may be more expensive compared to plastic or wooden options.

Wooden mouse trap boxes provide a natural and aesthetically pleasing option. They blend seamlessly with the surroundings and can be easily customized to match your home’s decor. However, they may require more maintenance to prevent rotting or warping.

Factors to consider when choosing a mouse trap box

When selecting a mouse trap box for your rodent pest control needs, there are several factors you should consider. These factors will help ensure that you choose the perfect trap box for your specific situation.

  1. Size: Consider the size of the mouse trap box in relation to the area you need to cover. Larger boxes are suitable for outdoor use or larger infestations, while smaller boxes are more suitable for indoor use.
  2. Accessibility: Check the design of the mouse trap box to ensure it has small openings that mice can easily enter but prevent larger animals from accessing the trap.
  3. Durability: Assess the material and construction of the mouse trap box to ensure it will withstand regular use and potential weather conditions if used outdoors.
  4. Ease of cleaning: Look for a mouse trap box that is easy to clean and maintain. This will help ensure the longevity of the trap box and prevent the spread of diseases.

By considering these factors, you can make an informed decision and choose a mouse trap box that meets your specific needs.

Benefits of using a mouse trap box for rodent pest control

Using a mouse trap box as part of your rodent pest control strategy offers several benefits. Let’s explore some of them:

  1. Safety: The primary benefit of using a mouse trap box is the added safety it provides. By housing the mouse trap inside a box, you can prevent accidental injuries to children and pets who may come into contact with the trap. This ensures that only the intended target, the mice, is affected.
  2. Efficiency: Mouse trap boxes are designed to enhance the efficiency of traditional mouse traps. The small openings in the box allow mice to enter while keeping larger animals out. This increases the chances of catching the target pests without disturbing other wildlife.
  3. Hygiene: By using a mouse trap box, you can maintain a higher level of hygiene. The box prevents mice from coming into direct contact with food, surfaces, or other areas where they can spread diseases. It also contains any mess or debris that may result from trapping the mice, making it easier to clean up.
  4. Versatility: Mouse trap boxes are versatile tools that can be used both indoors and outdoors. Whether you have a mouse problem in your kitchen, garage, or garden, you can find a suitable trap box to address the issue effectively.

With these benefits in mind, incorporating a mouse trap box into your rodent pest control strategy is a wise choice.

How to set up a mouse trap box effectively

Now that you understand the importance of mouse trap boxes and the benefits they offer, let’s discuss how to set up a trap box effectively.

  1. Choose the right location: Identify areas where you have noticed mouse activity, such as droppings or chewed materials. Place the trap box in these areas to maximize its effectiveness.
  2. Bait the trap: Apply a small amount of bait, such as peanut butter or cheese, to the trap inside the box. Ensure that the bait is securely placed so that mice cannot simply snatch it without triggering the trap.
  3. Set the trap: Follow the instructions provided with the mouse trap to set it properly. Most mouse traps require you to pull back a spring-loaded mechanism and secure it in place. Be careful while doing this to avoid accidentally triggering the trap.
  4. Secure the trap box: Close the trap box securely, ensuring that there are no gaps or openings that mice can escape through. This will prevent mice from accessing the bait without getting caught.
  5. Monitor and reset: Regularly check the trap box for any trapped mice. If a mouse is caught, follow the instructions to dispose of it safely and reset the trap. Continuously monitor the trap box until you no longer notice any mouse activity.

By following these steps, you can effectively set up a mouse trap box and increase your chances of successfully controlling rodent pests.

Best practices for maintaining and cleaning mouse trap boxes

To ensure the longevity and effectiveness of your mouse trap box, it’s important to adopt proper maintenance and cleaning practices. Here are some best practices to consider:

  1. Regular inspection: Inspect the trap box regularly to ensure that it is in good condition. Look for any signs of damage, such as cracks or holes, that may compromise its effectiveness.
  2. Remove trapped mice promptly: If you catch a mouse in the trap box, dispose of it promptly and safely. Follow your local guidelines for proper disposal methods. This will prevent any lingering odor or attraction for other mice.
  3. Clean the trap box: After disposing of a trapped mouse, clean the trap box thoroughly to remove any traces of blood, urine, or feces. Use gloves and a mild disinfectant to sanitize the box. Ensure that the trap box is completely dry before reusing it.
  4. Store the trap box properly: If you are not using the trap box for an extended period, store it in a clean and dry area. This will prevent any potential damage and ensure that the trap box is ready for use when needed.

By following these best practices, you can maintain your mouse trap box in optimal condition and maximize its effectiveness in rodent pest control.

Common mistakes to avoid when using mouse trap boxes

While mouse trap boxes are effective tools for rodent pest control, there are some common mistakes that homeowners make. Avoiding these mistakes will ensure that you get the most out of your mouse trap box. Let’s explore them:

  1. Using inadequate bait: It’s important to use enough bait to attract mice to the trap. Avoid using too little bait, as mice may be able to snatch it without triggering the trap. Experiment with different types and amounts of bait to find what works best for your situation.
  2. Placing traps in the wrong locations: Proper trap placement is crucial for success. Avoid placing traps in areas where mice are unlikely to frequent, such as open spaces or areas with no signs of mouse activity. Instead, focus on areas where you have noticed droppings, gnaw marks, or other signs of infestation.
  3. Neglecting regular monitoring: Regularly monitoring the trap box is essential to gauge its effectiveness. Avoid setting traps and forgetting about them. Check the traps at least once a day and reset them as needed. This will increase your chances of capturing mice quickly.
  4. Using worn-out or damaged traps: Ensure that the traps you use are in good working condition. Worn-out or damaged traps may not be effective in catching mice. Regularly inspect the traps for any signs of wear and tear and replace them as necessary.

By avoiding these common mistakes, you can optimize the use of your mouse trap box and achieve better results in rodent pest control.

Additional rodent pest control methods to complement mouse trap boxes

While mouse trap boxes are effective in controlling rodent pests, it’s worth considering additional methods to complement their use. Here are some alternative rodent pest control methods you can incorporate:

  1. Sealing entry points: Mice can enter your home through small cracks and openings. Inspect the exterior of your home and seal any potential entry points using caulk or steel wool. This will prevent mice from entering your home in the first place.
  2. Maintaining cleanliness: Mice are attracted to food sources and cluttered environments. Keep your home clean and free from food debris. Store food in sealed containers and clean up spills promptly. Declutter areas where mice can hide, such as basements, attics, and garages.
  3. Using ultrasonic devices: Ultrasonic devices emit high-frequency sounds that are unpleasant to rodents. These devices can be used in conjunction with mouse trap boxes to deter mice from entering your home. Place them strategically in areas where you have noticed mouse activity.
  4. Consulting professional pest control services: If you’re dealing with a severe rodent infestation or have tried various methods without success, it may be time to seek professional help. Pest control services have the expertise and tools to effectively eliminate rodent pests and prevent future infestations.

By combining these additional methods with the use of mouse trap boxes, you can create a comprehensive rodent pest control strategy tailored to your specific needs.

Conclusion

In conclusion, choosing the perfect mouse trap box is crucial for effective rodent pest control. These specially designed containers offer numerous benefits, including safety, efficiency, hygiene, and versatility. By considering factors such as size, accessibility, durability, and ease of cleaning, you can make an informed decision when selecting a mouse trap box.

For all of your rodent removal needs in the Omaha & Lincoln areas, Recon Pest Services is here to help. Contact us today for a free quote!

Recon CTAs 1200x200 Rodents

Small Roaches: Unveiling their Habits and Effective Ways to Eradicate Them

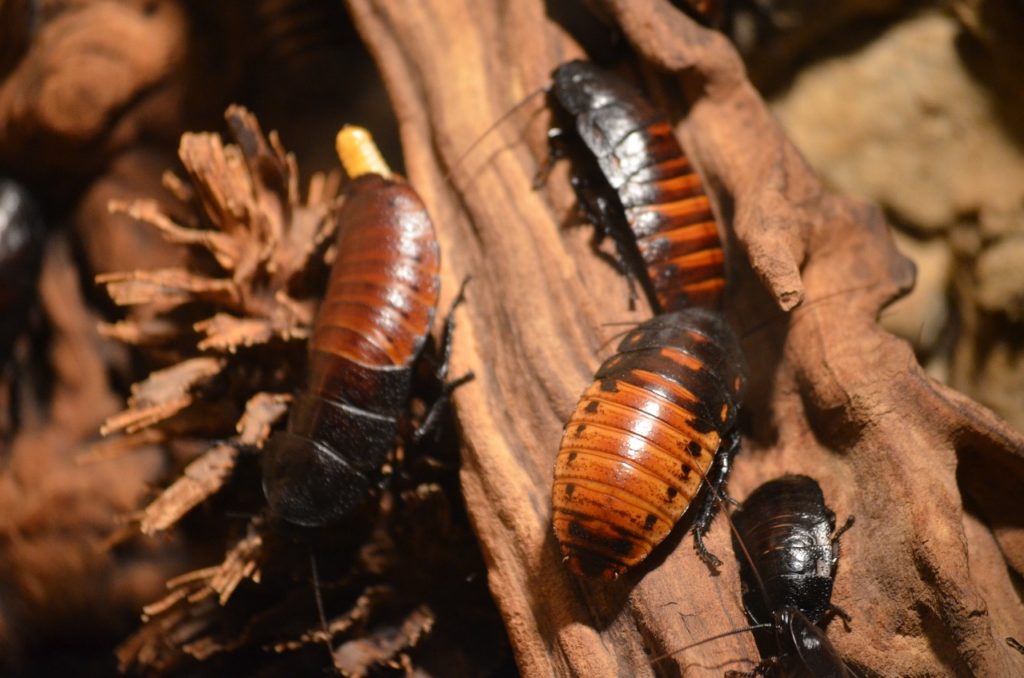
Small roaches

You’ve probably seen them scuttling around your kitchen or bathroom, the small, uninvited guests seeking warmth and food – small roaches. These tiny intruders are not just a nuisance, but can also pose significant health risks. Understanding small roaches, their habits, and effective ways to eradicate them can help you maintain a clean, roach-free home.

Small roaches, or cockroaches, are a common pest worldwide. There are over 4,000 species of cockroaches, but only a few are considered pests. These insects are incredibly resilient and can survive in a variety of environments, from the freezing cold to the extreme heat.

Small roaches are nocturnal creatures. They spend their days hiding in dark, secluded areas of your home, only coming out at night to feed. They are attracted to food, water, and clutter, making your kitchen and bathroom their preferred hideouts.

Common Types of Small Roaches

When it comes to small roaches, you’re likely to encounter several common species. The German cockroach is one of the most prevalent types, recognized by its light brown color and two dark stripes on its back. It’s fond of warm, humid places and is often found in kitchens and bathrooms.

The Brown-Banded cockroach is another species you might find in your home. As the name suggests, it has two light bands across its dark brown body. Unlike the German cockroach, the Brown-Banded species prefers drier locations like furniture and appliances.

Last but not least, the Oriental cockroach is a common household pest. Although larger than the German and Brown-Banded roaches, it’s still considered a small roach. Its shiny, dark body sets it apart from the others, and it tends to inhabit cool, damp areas like basements and drains.

Habits and Behavior of Small Roaches

Regardless of the species, small roaches exhibit similar behaviors. They are nocturnal and will scatter when exposed to light. During the day, they hide in cracks and crevices, coming out at night to scavenge for food and water.

Small roaches are omnivores and will eat just about anything, from food crumbs to paper and glue. They are especially attracted to starches, sweets, and meat products. If food and water sources are scarce, roaches can survive for weeks without eating and can even resort to cannibalism.

These pests are also excellent breeders. A single female roach can produce hundreds of offspring in her lifetime, leading to rapid infestations. Understanding these habits can help you spot an infestation early and take swift action to eradicate the pests.

Signs of a Small Roach Infestation

Recognizing the signs of a small roach infestation is crucial for timely intervention. One of the most tell-tale signs is spotting a roach during the day. As nocturnal creatures, roaches that are seen in daylight may indicate overcrowding and a possible large infestation.

Other signs include finding roach droppings, which resemble black pepper or coffee grounds, and roach egg cases, which are small, brown, and oval-shaped. A musty, unpleasant odor is also a strong indication of a large-scale infestation.

Moreover, you might notice damage to items such as books, food packages, and wallpapers. Roaches have a voracious appetite and can feed on a variety of items, causing noticeable damage.

Health Risks Associated with Small Roaches

Small roaches are more than just a nuisance; they pose significant health risks. Roaches crawl through dirty areas and can carry bacteria and parasites, which they can spread to food and surfaces in your home.

One of the most significant risks is food poisoning. Roaches can contaminate food with Salmonella and E.coli, causing diarrhea, fever, and abdominal cramps. They can also trigger allergies and asthma, especially in children. The allergens produced by roaches can lead to coughing, nasal congestion, skin rashes, and severe asthma attacks.

Additionally, roaches can spread parasitic worms and other harmful organisms. Regular cleaning, proper food storage, and effective roach control are crucial to protect your family’s health.

Prevention Tips to Keep Small Roaches Away

Prevention is always better than cure. To keep small roaches at bay, maintain cleanliness in your home. Clean up spills immediately, wipe down counters regularly, and avoid leaving dirty dishes in the sink overnight.

Proper food storage is also crucial. Store food in airtight containers and keep your pantry and refrigerator clean and free from crumbs. Regularly take out the trash and ensure your bins are sealed.

Eliminate any potential hiding spots by decluttering your home. Keep storage areas clean and organized and seal cracks and crevices where roaches can hide. Also, fix any leaks promptly as roaches are attracted to water.

Effective Ways to Eradicate Small Roaches

If you’re already dealing with a small roach infestation, there are several effective ways to eradicate these pests. Over-the-counter insecticides and baits can kill roaches and are easy to use. Place them in areas where you’ve seen roaches, like under sinks, behind appliances, and along baseboards.

Roach traps are another effective tool. These traps lure roaches in with bait and then trap them with a sticky substance. Keep in mind that these methods may take time and patience to completely eliminate the infestation.

For severe infestations, professional pest control may be necessary. Professionals have access to powerful insecticides and have the expertise to ensure that roaches are completely eradicated.

Natural Remedies for Small Roach Control

If you prefer a more natural approach, there are several remedies you can try. Diatomaceous earth is a natural powder made from tiny fossilized aquatic organisms. It’s non-toxic to humans and pets, but lethal to roaches. Sprinkle it in areas where you’ve seen roaches.

Boric acid is another effective natural remedy. Mix equal parts of boric acid, flour, and sugar to make a homemade roach killer. The roaches are attracted to the sugar and flour, and the boric acid kills them.

Remember, natural remedies may take longer to work than commercial products, and they must be used consistently to be effective.

Professional Pest Control Services for Small Roaches

When it comes to severe infestations, professional pest control services are your best bet. These experts have the knowledge, tools, and experience to effectively eradicate small roaches from your home.

Professional pest control services offer comprehensive solutions that not only eliminate the existing roaches but also prevent future infestations. They will also provide guidance and recommendations to help you maintain a roach-free home.

Remember, the quicker you act, the easier it will be to get rid of the roaches. Don’t let these pests take over your home. For all of your roach removal needs in the Omaha & Lincoln areas, Recon Pest Services is here to help. Contact us today for a free quote!
Conclusion and Final Thoughts

Small roaches may be small in size, but they can cause significant problems if left unchecked. By understanding their habits and knowing the signs of an infestation, you can take swift action to eliminate these pests from your home.

Remember, prevention is key. Maintaining cleanliness and promptly addressing any signs of an infestation can help keep your home roach-free. Whether you choose DIY remedies, over-the-counter products, or professional pest control services, the important thing is to act quickly and decisively.

Remember, Recon Pest Services is always here to help. Don’t let small roaches ruin your peace of mind. Contact us today for a free quote and reclaim your home from these pesky invaders.

Recon CTAs 1200x200 Roaches

Effective Heat Treatment for Termites: The Ultimate Guide

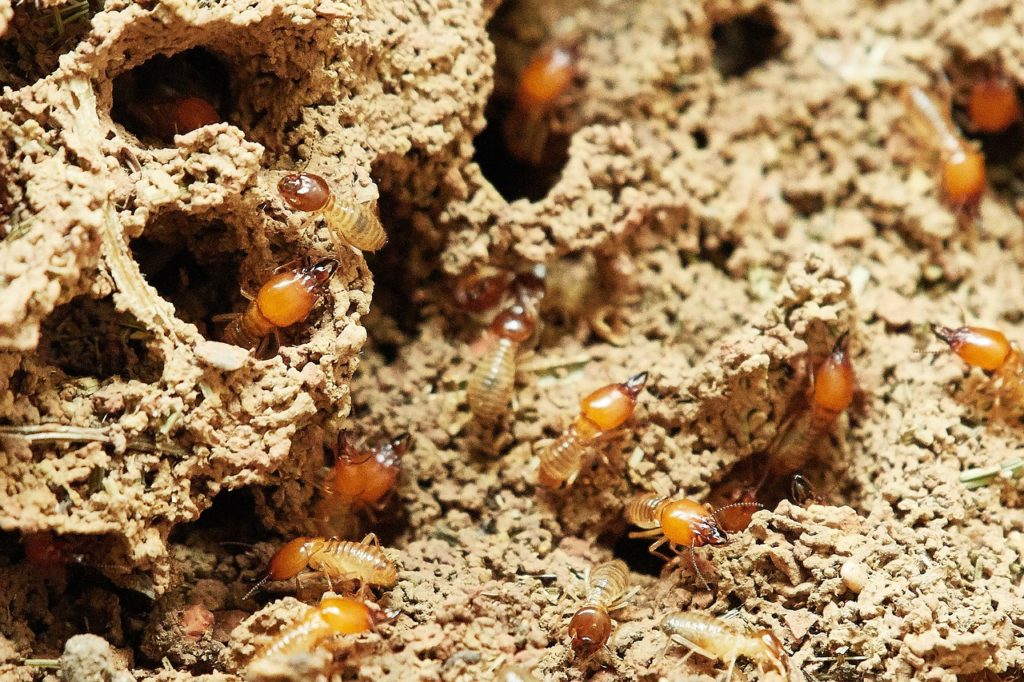
Termites in mulch

Termite infestations can be a homeowner’s worst nightmare. These tiny pests can cause extensive damage to your property and compromise its structural integrity. If you’ve discovered termites in your home, it’s crucial to take immediate action to eliminate them. One highly effective method of termite control is heat treatment. In this comprehensive guide, we will explore how heat treatment works, its benefits, and why it may be the right choice for termite control in your home.

What is Heat Treatment for Termites?

Heat treatment is a termite control method that involves raising the temperature of the infested area to a level that is lethal for termites. This process utilizes specialized equipment to heat the affected areas, penetrating the wood and other hidden spaces where termites may be hiding. The high temperatures used during heat treatment effectively kill termites in all life stages, including eggs, nymphs, and adults.

How Does Heat Treatment Work?

During heat treatment, the temperature in the infested area is gradually increased to a level that is lethal for termites, typically between 120°F and 140°F. The duration of the treatment depends on the severity of the infestation and the size of the area being treated. As the temperature rises, the heat penetrates the wood and reaches the hidden galleries and nests where termites reside. This effectively kills the termites and destroys their colonies, providing long-lasting termite control.

Heat treatment also has the added benefit of reaching areas that may be inaccessible to other termite control methods. The heat can penetrate walls, floors, and even furniture, ensuring that all termites are eradicated. Additionally, heat treatment can be used as a localized treatment for specific areas of the home, making it a versatile option for termite control.

Benefits of Heat Treatment for Termites

Heat treatment offers several significant benefits when it comes to termite control. Firstly, it is a non-toxic and environmentally friendly method. Unlike chemical treatments, which may involve the use of harmful pesticides, heat treatment poses no risk to humans, pets, or the environment. It is a safe and sustainable option for eliminating termites from your home.

Another advantage of heat treatment is its ability to provide thorough eradication of termites. The high temperatures used during the process ensure that all termites, including eggs and nymphs, are killed. This eliminates the risk of future infestations and provides long-term protection for your property.

Additionally, heat treatment is a relatively quick process compared to other termite control methods. Depending on the size of the infested area, treatment can typically be completed within a day or two. This means minimal disruption to your daily routine and allows you to quickly regain control of your home.

Preparation for Heat Treatment

Before heat treatment can be conducted, certain preparations need to be made to ensure its effectiveness. Firstly, all people and pets must be evacuated from the premises as the high temperatures can be hazardous. It is also important to remove any heat-sensitive items, such as electronics, plants, and flammable materials from the treatment area.

Furthermore, it is essential to clear the treatment area of clutter and debris, allowing the heat to penetrate all areas effectively. This includes removing furniture, wall hangings, and any other obstacles that may hinder the heat distribution. By properly preparing the area, you can maximize the efficiency and effectiveness of the heat treatment process.

Conducting Heat Treatment for Termites

Once the necessary preparations have been made, the heat treatment process can begin. Professional termite exterminators will use specialized equipment to generate and regulate the heat within the treatment area. This ensures that the temperature remains consistent and reaches the lethal level required to eliminate termites.

During the treatment, the exterminators will closely monitor the temperature and adjust the equipment as needed. They will also pay attention to potential hot spots and ensure that all areas are heated evenly. This careful monitoring and control of heat distribution are essential for the successful eradication of termites.

Post-Treatment Precautions and Maintenance

After the heat treatment is completed, it is crucial to take certain precautions and perform regular maintenance to prevent future termite infestations. Firstly, it is important to seal any cracks or gaps in your home’s foundation, as these can serve as entry points for termites. Regularly inspect your property for signs of termite activity, such as mud tubes or damaged wood, and promptly address any issues that arise.

Additionally, maintaining proper ventilation and humidity control in your home can help prevent termite infestations. Termites are attracted to moisture, so it is important to address any water leaks or damp areas promptly. By implementing these preventive measures, you can minimize the risk of future termite problems and protect your home.

Comparing Heat Treatment with Other Termite Control Methods

While heat treatment is a highly effective termite control method, it is important to consider other options before making a decision. Chemical treatments, for example, can provide long-term protection against termites. However, they may involve the use of potentially harmful pesticides and require reapplication over time.

Another termite control method to consider is baiting systems. These systems use bait stations to attract and eliminate termites. While they can be effective, they may take longer to eradicate a termite infestation compared to heat treatment. It is important to weigh the pros and cons of each method and choose the one that best suits your specific needs and preferences.

Hiring a Professional for Heat Treatment

While some homeowners may attempt to perform heat treatment themselves, it is highly recommended to hire a professional termite exterminator. Professionals have the knowledge, experience, and specialized equipment required to conduct heat treatment safely and effectively. They can assess the severity of the infestation, determine the appropriate treatment plan, and ensure that all termites are eliminated.

When hiring a professional for heat treatment, it is essential to choose a reputable and licensed extermination company. Research their credentials, read reviews from previous customers, and request a detailed quote before making a decision. By entrusting the job to professionals, you can have peace of mind knowing that your termite problem will be effectively addressed.

Conclusion: Is Heat Treatment the Right Choice for Termite Control?

Heat treatment is undoubtedly a highly effective and environmentally friendly method for termite control. Its ability to reach hidden areas, thorough eradication of termites, and minimal disruption to your daily routine make it an attractive option for homeowners. However, it is important to consider other termite control methods and consult with a professional exterminator before making a decision.

For all of your termite extermination needs in the Omaha & Lincoln areas, Recon Pest Services is here to help. Our team of experienced professionals can assess your termite infestation, provide expert advice, and conduct heat treatment to ensure the complete eradication of termites. Contact us today for a free quote and take the first step towards a termite-free home!

Recon CTAs 1200x200 Termites

Understanding Delayed Wasp Sting Reactions: What to Know

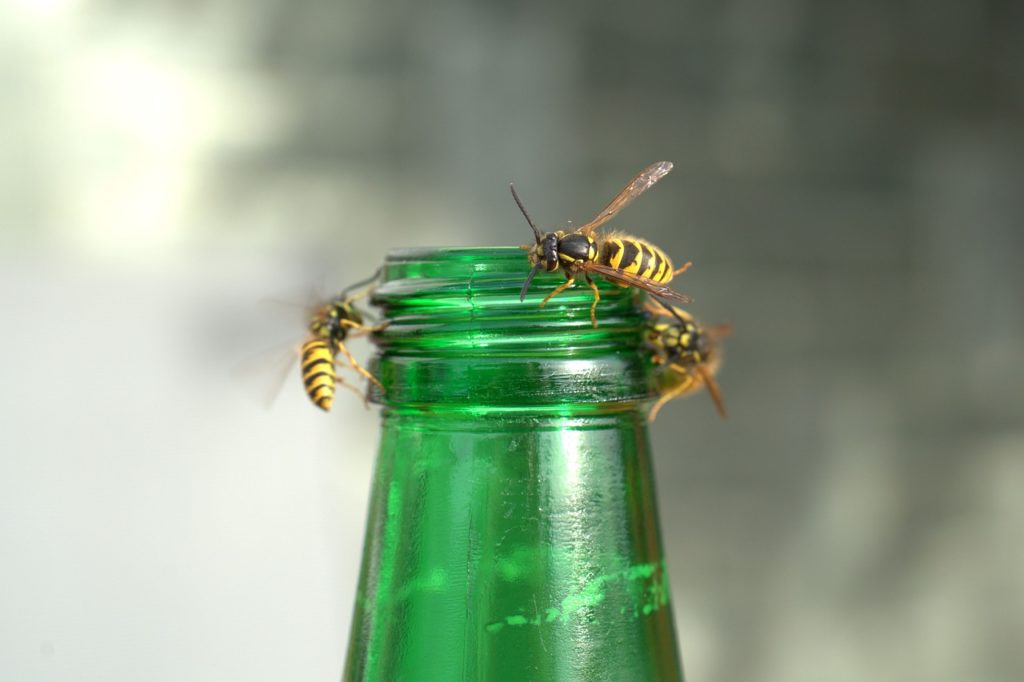
delayed wasp sting reaction

Have you ever been stung by a wasp and experienced a delayed reaction? Delayed wasp sting reactions can be a cause for concern, as they often catch people off guard. In this article, we will delve into the world of delayed wasp sting reactions, exploring their symptoms, causes, and treatment options. By understanding these reactions, you can better protect yourself and know when to seek medical help.

Symptoms and Signs of Delayed Wasp Sting Reactions

Delayed wasp sting reactions can manifest in various ways, making them difficult to identify. Some common symptoms include swelling, redness, and itching around the sting area. These symptoms may not appear immediately after the sting, but rather develop hours or even days later. In some cases, individuals may experience more severe reactions, such as difficulty breathing, dizziness, or a rapid heartbeat. It is important to monitor your symptoms closely and seek medical help if they worsen or persist.

Causes and Triggers of Delayed Wasp Sting Reactions

Delayed wasp sting reactions occur when the immune system overreacts to the venom injected by the wasp. The exact cause of this overreaction is not fully understood, but there are certain factors that can trigger it. Allergies to wasp stings, previous severe reactions to stings, and multiple stings at once can increase the likelihood of a delayed reaction. Other triggers may include stress, certain medications, and underlying health conditions. Identifying these triggers can help you take preventive measures and reduce the risk of delayed wasp sting reactions.

How to Prevent Delayed Wasp Sting Reactions

Prevention is key when it comes to delayed wasp sting reactions. If you know that you are allergic to wasp stings or have had a severe reaction in the past, it is important to take precautions. Avoid areas where wasps are known to nest, such as gardens or outdoor dining areas. Wear protective clothing, such as long sleeves and pants, when spending time outdoors. Additionally, consider carrying an epinephrine auto-injector if you are at high risk of a severe reaction. By being proactive, you can minimize the chances of experiencing a delayed wasp sting reaction.

Treatment Options for Delayed Wasp Sting Reactions

If you do experience a delayed wasp sting reaction, there are treatment options available. Over-the-counter antihistamines can help reduce itching and swelling. Applying a cold compress to the affected area can also provide relief. In more severe cases, a doctor may prescribe corticosteroids or epinephrine to alleviate symptoms. It is important to follow the recommended treatment plan and seek medical help if your symptoms worsen or do not improve.

When to Seek Medical Help for Delayed Wasp Sting Reactions

While most delayed wasp sting reactions can be managed at home, there are situations where medical help is necessary. If you experience difficulty breathing, tightness in the chest, or swelling of the face, lips, or throat, it is crucial to seek immediate medical attention. These symptoms may indicate a severe allergic reaction, known as anaphylaxis, which requires prompt treatment. It is always better to err on the side of caution and seek help if you are unsure about the severity of your reaction.

Coping with Delayed Wasp Sting Reactions

Dealing with delayed wasp sting reactions can be challenging, both physically and emotionally. It is important to take care of yourself and seek support from others. Reach out to friends, family, or support groups who can provide guidance and understanding. Educate yourself about wasp sting reactions and develop a plan for managing future incidents. By taking proactive steps and surrounding yourself with a strong support system, you can cope with delayed wasp sting reactions more effectively.

FAQs about Delayed Wasp Sting Reactions

Q: Can anyone experience delayed wasp sting reactions?

A: While anyone can be stung by a wasp, not everyone will experience a delayed reaction. Those who are allergic or have had severe reactions in the past are more likely to experience delayed symptoms.

Q: Are delayed wasp sting reactions dangerous?

A: In most cases, delayed wasp sting reactions are not life-threatening. However, severe reactions can occur, and it is important to seek medical help if you experience difficulty breathing or other severe symptoms.

Q: Can delayed wasp sting reactions be prevented?

A: While it is not always possible to prevent delayed wasp sting reactions, taking preventive measures, such as avoiding wasp-infested areas and wearing protective clothing, can reduce the risk.

Q: How long do delayed wasp sting reactions last?

A: The duration of delayed wasp sting reactions can vary. Mild symptoms may subside within a few days, while more severe reactions can last up to a week or longer.

Resources and Support for Delayed Wasp Sting Reactions

If you are seeking more information or support regarding delayed wasp sting reactions, there are resources available to help you. Reach out to your healthcare provider for personalized advice and guidance. Additionally, organizations such as the American Academy of Allergy, Asthma & Immunology can provide valuable resources and support.

Conclusion

Delayed wasp sting reactions can be unsettling, but with knowledge and preparedness, you can navigate through them more confidently. By understanding the symptoms, causes, and treatment options, you can take preventive measures and seek help when needed. Remember, if you are experiencing a severe reaction or are unsure about the severity of your symptoms, always seek immediate medical attention. For all of your wasp removal needs in the Omaha & Lincoln areas, Recon Pest Services is here to help. Contact us today for a free quote!

Recon CTAs 1200x200 Wasps

The Life Expectancy of a Mosquito: A Comprehensive Guide

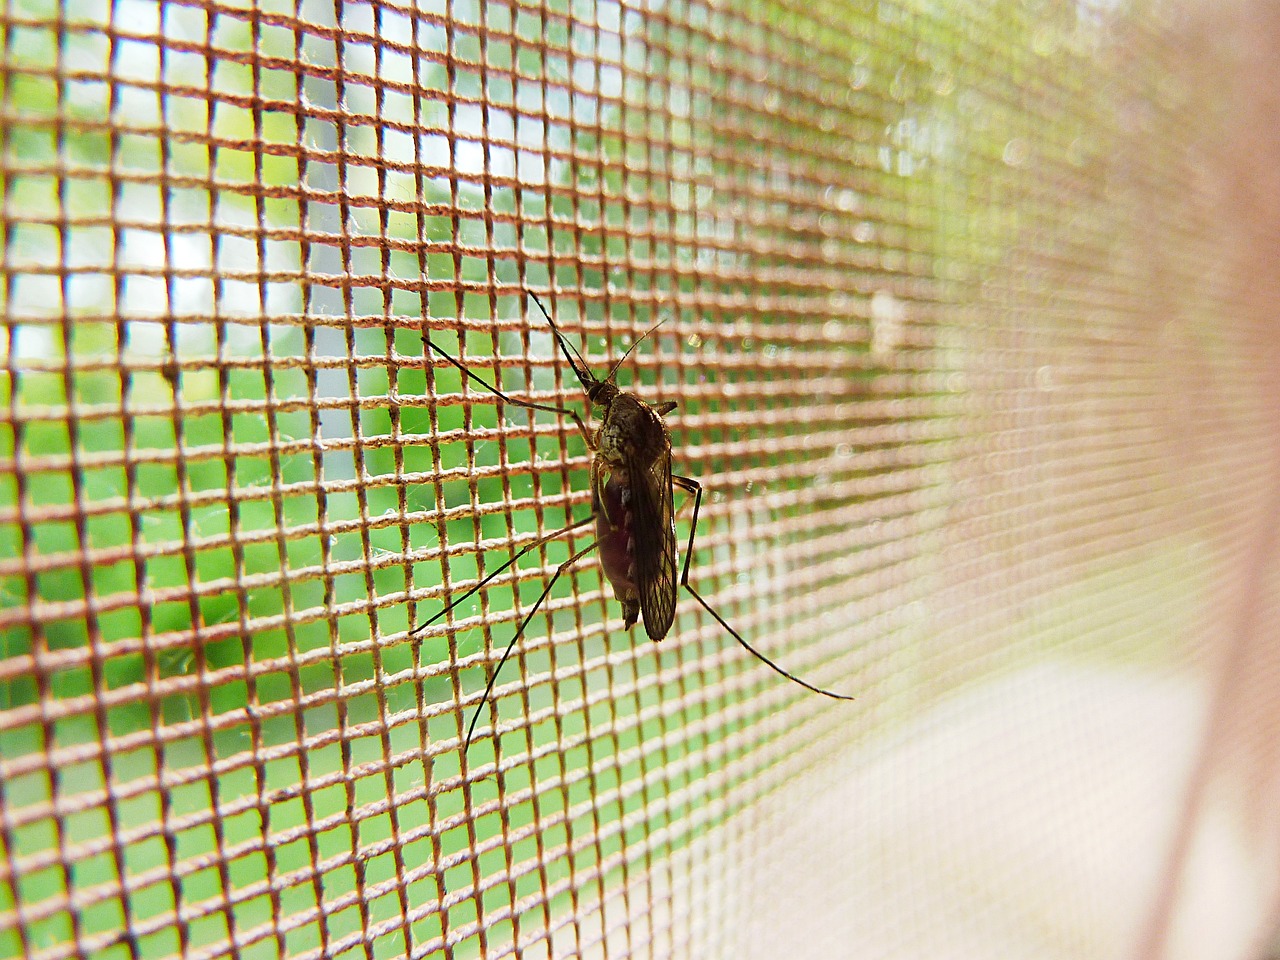
Why are there mosquitos in my house

You’ve undoubtedly seen these little critters buzzing around, particularly during the hot summer months. Yes, we’re talking about mosquitoes, the bothersome pests that are notorious for their itchy bites and potential to spread diseases. But have you ever wondered about the life expectancy of a mosquito? Let’s unravel the mystery surrounding these tiny creatures!

The Mosquito’s Life Cycle

Embryonic Stage: The Egg

Mosquitoes start their lives as eggs, which are often laid in large numbers, sometimes up to several hundred at a time. The fascinating aspect is that mosquito eggs need water to hatch, leading these insects to lay their eggs near or in water bodies. The choice of water body can vary significantly among different mosquito species, with some preferring flood plains and others opting for the small amount of standing water in a flower pot or discarded tire.

Infant Stage: The Larvae

Upon hatching, mosquito eggs morph into what is commonly known as “wigglers” or mosquito larvae. These wigglers are usually seen hanging upside down from the water surface, breathing through a siphon tube. Their limited mobility makes them an easy meal for fish, frogs, and salamanders. Not only are they a part of the food chain, but they also contribute to the ecosystem by filtering organic matter in the water, thus promoting plant growth.

Adolescence: The Pupa

After going through four molting stages, the mosquito larvae transform into pupae. Also known as “tumblers,” these pupae can move around the water using their newly formed tails. This stage is akin to a brief rest period during which they undergo metamorphosis, and within a couple of days, they emerge as adult mosquitoes.

Adulthood: The Mosquito

Once they surface from the water and dry off, they take flight and begin their adult life. Contrary to popular belief, mosquitoes don’t rely on blood for their daily energy needs. Instead, they feed on nectar from fruits, flowers, and other plants. They play a significant role as pollinators in the ecosystem. So, the next time you see a vibrant blooming flower, remember, a mosquito might have played a part in that!

The Life Expectancy of a Mosquito

The life expectancy of a mosquito is influenced by several factors, including the species, environmental conditions, and time of year. On average, female mosquitoes tend to live for a few weeks, while males have a shorter lifespan of about one week. However, in the absence of predators and harsh weather conditions, some mosquitoes are known to live for several months.

Species-Specific Lifespans

The life expectancy of a mosquito can vary considerably among different species. For instance, the common house mosquito, known scientifically as Culex pipiens, lives for about 10 to 60 days. In contrast, the Asian Tiger Mosquito, or Aedes albopictus, can live for around 30 to 40 days. Female mosquitoes usually outlive their male counterparts, with the males living for about a week and females living up to a month.

Environmental Factors Affecting Lifespan

Environmental conditions also play a significant role in determining the life expectancy of a mosquito. Factors such as temperature, humidity, and availability of food significantly affect their lifespan. Indoor environments, with their stable conditions and lack of predators, often provide ideal conditions for mosquitoes, allowing them to live longer than they would outdoors.

Mosquitoes and Seasonal Changes

It’s a common misconception that mosquitoes die off during winter. Some species of mosquitoes have a survival strategy known as “overwintering,” which is essentially a form of hibernation that allows them to live through the winter months. This means that the mosquitoes you encounter in spring might be the same ones that were around in the fall!

Mosquitoes Indoors: A Perfect Haven?

Mosquitoes that find their way indoors can live for up to a month, thanks to the absence of natural predators and the ideal living conditions. Your home provides numerous dark, humid hiding spots like under the sink, in closets, and garages, which are perfect for mosquitoes. Additionally, they have access to plenty of food and water sources within your home.

The Role of Blood in a Mosquito’s Life

Though it is widely believed that mosquitoes feed on blood, only female mosquitoes require blood, and that too for the purpose of egg development. A single blood meal can help a female mosquito lay up to 300 eggs! However, mosquitoes can survive without blood, as they usually feed on nectar, fruit juice, and plant sap for their nutritional needs.

Mosquito Reproduction: A Rapid Process

Mosquitoes are prolific breeders, and after a female mosquito has a blood meal, she can lay up to 300 eggs at once. It only takes about 8 to 10 days for these eggs to hatch and develop into adult mosquitoes. This swift reproductive cycle can lead to a rapid increase in mosquito population if not controlled effectively.

Controlling the Mosquito Population

Effective mosquito control involves managing their breeding grounds. Mosquitoes typically lay their eggs in stagnant water, so by eliminating or regularly cleaning and replacing sources of standing water, you can keep their population under control. Using mosquito dunks or larvicides can also help control mosquitoes outside your home.

Need Professional Help?

For the best pest management solutions in Omaha and Lincoln, contact Recon Pest Services for a free quote. Their team of experts can help you effectively control and manage the mosquito population around your property, providing you with a safe, mosquito-free environment.

Conclusion

Understanding the life expectancy of a mosquito and their life cycle can help in devising effective strategies for controlling their population. While they play a crucial role in our ecosystem, their ability to spread diseases makes it necessary to keep their numbers in check. Remember, an informed approach can go a long way in keeping these pesky insects at bay!

Recon CTAs 1200x200 Mosquito

Choosing the Best Bait for Mouse Traps

mouse trap

Are you tired of those pesky little rodents running around your house, causing a nuisance, and posing a potential health risk to your family? It’s time to spring into action and put an end to this nuisance once and for all. This comprehensive guide will take you through the best baits for mouse traps that will help you successfully eradicate these unwelcome guests from your home.

Understanding Mouse Behavior

Before you set out to catch a mouse, it’s essential to understand their behavior. Mice are cautious creatures and are wary of anything new in their environment. This is why you should first place bait without traps for a few days to acclimate the mice to the new addition. Once the bait starts disappearing consistently, you can introduce mouse traps.

Remember, mice multiply quickly. A single female mouse can give birth to six or seven babies in just three weeks. Therefore, it’s crucial to put out multiple traps. Place at least one trap every 18 inches along frequently trafficked areas, and for best results, place traps 2 or 3 inches apart along the entire length of identified “rodent runways.” These are areas where mouse droppings, mouse urine (visible by black light), or that icky mouse sludge accumulates when many mice travel down the same path.

The Power of Peanut Butter

Peanut butter is the undisputed champion when it comes to the best bait for mouse traps. Mice are innately attracted to the strong, nutty aroma and sweetness of peanut butter. Not only is it delicious to them, but its sticky nature also ensures that once a mouse touches it, it’s likely to trigger the trap.

The Sweet Lure of Candy

Mice have quite the sweet tooth. Therefore, candy makes an excellent bait for mouse traps. Soft candies are particularly effective as they require the mouse to exert effort to remove them, increasing the likelihood of triggering the trap.

The Delectable Aroma of Hot Dogs

Hot dogs are another great bait option. Their strong and distinctive smell can easily be detected by rodents, luring them straight towards the trap. Plus, hot dogs can be cut up to any size to fit your trap, making them a convenient bait choice.

The Deadly Allure of Sapphire Grain 25

If you’re using a bait station, Sapphire Grain 25 is an excellent choice. This oat grain bait is poisonous to mice and rats. Upon exposure, the rodent will likely move away from the station and die, allowing you to easily get rid of it a few days later.

The Tempting Taste of Pet Food

Pet food, particularly wet pet food, is another highly effective bait. Its strong smell is perfect for baiting and trapping mice. However, ensure the traps are placed where your pets cannot access them. Lofts and attics are ideal locations.

The Classic Appeal of Cheese

It’s not just a cartoon cliché; mice do love cheese. While they may not prefer it as much as sweet treats, the strong smell of cheese, particularly smelly ones, is very effective in luring mice to traps.

The Natural Attraction of Birdseed and Nuts

Mice are accustomed to eating seeds and nuts in the wild. So, bird seeds and nuts are naturally appealing to them as bait.

Bait Station Maintenance

While bait stations are highly effective in eliminating multiple rodents at once, they require proper setup and maintenance. Ensure that the bait station placement is strategic and that the poisonous bait is not exposed to the surroundings, as it can be harmful to pets and small children.

When to Change the Bait

It’s essential to regularly change the bait in your mouse traps. If a trap has caught a mouse, the bait should be replaced immediately. Even if the trap hasn’t caught any mice, it’s a good idea to change the bait after two days. Regularly changing the bait ensures its freshness and effectiveness.

Conclusion

Choosing the best bait for mouse traps is critical to successfully catching and eliminating mice from your home. While peanut butter, candy, hot dogs, Sapphire Grain 25, pet food, cheese, and bird seeds and nuts are all excellent choices, remember to consider the specific needs and behaviors of the mice in your home.

If you need professional help in dealing with a rodent infestation, contact Recon Pest Services for the best pest management solutions in Omaha and Lincoln. With their expert knowledge and experience, they can provide a comprehensive solution to your pest problem.

Remember, the key to successful pest control isn’t just about setting traps and using bait; it’s about understanding the behavior of the pests, placing traps strategically, and keeping them well-maintained. With these tips in mind, you’ll be well on your way to a mouse-free home.

Good luck, and happy trapping!

Recon CTAs 1200x200 Rodents

Unveiling the Mystery: What Do Silverfish Eat? An In-depth Analysis

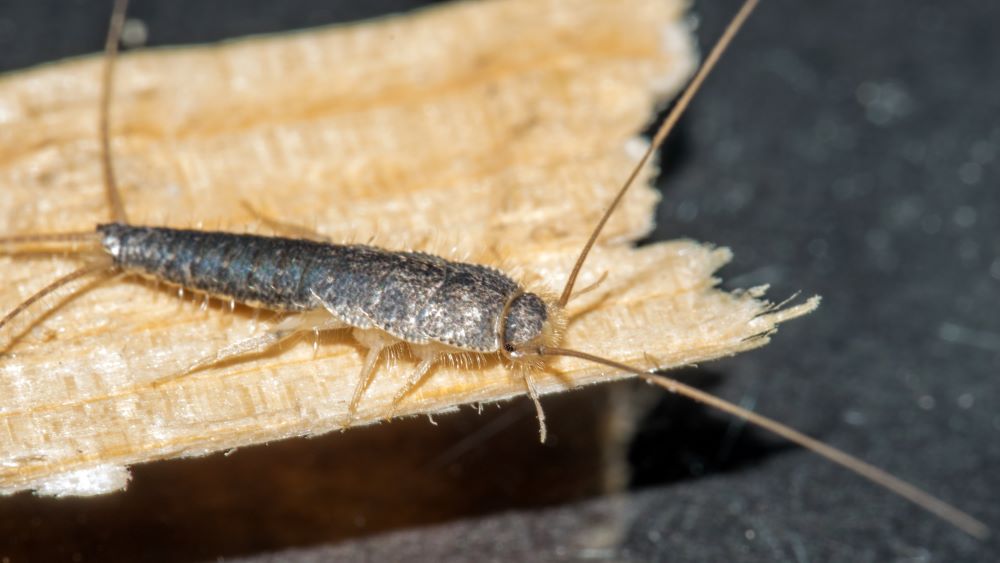
What do silverfish eat

You’ve probably come across them in your bathroom or kitchen, these small silver creatures that scuttle away when you turn on the light. Yes, we’re talking about silverfish. They’re a common household pest that can be quite a nuisance, but do you really know what they are? Or what they eat? This article will delve into the mystery and bring you face-to-face with the fascinating world of the silverfish diet.

But before we dive into what do silverfish eat, let’s take a moment to understand these creatures a little better. Silverfish are small, wingless insects known for their fish-like appearance and movements. They’re nocturnal and prefer to live in damp, dark places, like your kitchen or bathroom.

These insects have been on earth for over 400 million years, predating dinosaurs by a long shot. Despite their longevity, silverfish are still quite mysterious, largely due to their nocturnal habits and elusive nature. That’s why we’re here today, to unveil the mystery of what silverfish eat.

What Are Silverfish?

Silverfish are small, wingless insects that belong to the order Thysanura. They get their name from their silvery-blue color and the fish-like way they move. Their bodies are teardrop-shaped, and they have three long bristles on their rear end. Silverfish are nocturnal creatures and can live up to eight years, which is quite long for an insect.

Despite their small size, silverfish are quite hardy. They can survive in almost any climate, but they prefer humid and damp areas. This is why you often find them in bathrooms, kitchens, basements, and attics. They’re also very fast runners, which helps them escape from predators and from your attempts to squash them.

Now that you know what silverfish are, you might be wondering why you should care. Well, while silverfish aren’t dangerous to humans, they can cause damage to your home. They have a penchant for paper and damp clothing, and large infestations can lead to significant damage. But to understand how to prevent this, we first need to understand what do silverfish eat.

The Diet of a Silverfish: What Do Silverfish Eat?

The diet of a silverfish is quite diverse. These insects are able to eat a variety of substances, thanks primarily to their ability to digest cellulose. In fact, silverfish are among the few animals in the world that can do this.

Silverfish are omnivorous and will eat almost anything. However, they prefer foods high in protein, sugar, or starch. This includes book bindings, wallpaper glue, and some paints. They’ll also eat various types of fabric, especially if it’s been stored in a damp place.

In addition to these, silverfish will eat mold and fungi, which is why they’re often found in damp areas. They’ll also eat other insects and even their own molted skin or eggs if food is scarce. So, what do silverfish eat? The answer is pretty much anything, but they prefer foods rich in carbohydrates and protein.

Factors That Influence What Silverfish Eat

There are several factors that influence what silverfish eat. The first is availability. Silverfish are opportunistic eaters and will consume whatever is available to them. This is why they’re often found in kitchens and bathrooms, where there’s plenty of food and moisture.

The second factor is moisture. Silverfish need a high humidity environment to survive, and they get much of their water from the food they eat. This is why they’re often found in damp areas and why they prefer to eat moist foods.

The third factor is competition. If there are other insects in the area that eat the same food, silverfish may be forced to change their diet. They’re not particularly aggressive, so they’ll usually retreat if there’s competition.

Common Misconceptions About the Silverfish Diet

There are several misconceptions about the silverfish diet. The most common is that they only eat paper and clothes. While it’s true that silverfish can and do eat these items, they’re not their only source of food. As we’ve seen, silverfish can eat a wide variety of foods, including mold, other insects, and their own exoskeletons.

Another misconception is that silverfish eat wood. This is not true. While silverfish can damage wood by eating the glue that holds it together, they do not actually eat the wood itself. This is an important distinction to make, especially when it comes to controlling silverfish infestations.

The Impact of the Silverfish Diet on Their Habitat

The diet of a silverfish can have a significant impact on their habitat. Because they eat a wide variety of foods, they can survive in many different environments. This is one of the reasons why they’re such a common household pest.

However, their diet can also lead to damage. Silverfish can cause significant damage to books, wallpaper, and clothes. They can also contaminate food with their droppings. This is why it’s important to control silverfish infestations.

Prevention and Control: Keeping Silverfish Away by Controlling Their Diet

The key to preventing and controlling silverfish infestations is to control their diet. By removing their food sources, you can make your home less attractive to them.

Start by reducing the humidity in your home. Use a dehumidifier in damp areas and fix any leaks that may be providing silverfish with a water source. Also, keep your home clean. Vacuum regularly to remove food crumbs and store food in airtight containers.

In addition to these measures, you can also use insecticides or call a professional pest control service. These methods can be effective, but they should be used as a last resort. Prevention is always the best strategy when it comes to silverfish.

Conclusion: The Importance of Understanding What Silverfish Eat

Understanding what silverfish eat is crucial for controlling them. By knowing their diet, you can remove their food sources and make your home less attractive to them. You’ll also be able to spot an infestation early, before it can cause significant damage.

Remember, silverfish are hardy creatures. They’ve survived on earth for over 400 million years, and they can live up to eight years. If you want to get rid of them, you’ll need to be persistent.

But don’t worry, you’re not alone. There are plenty of resources available to help you, including professional pest control services. So, if you’re wondering what do silverfish eat and how you can use this information to control them, don’t hesitate to reach out for help.

For the best pest management solutions in Omaha and Lincoln, contact Recon Pest Services for a free quote. Our team of experts will be more than happy to help you understand what silverfish eat and how to control them.

Recon CTAs 1200x200 General

The Lifecycle, Habitat, and Management of Termites in Nebraska

does mulch attract termites?

Termites are prevalent in numerous parts of the United States, and Nebraska is no exception. These tiny eusocial insects, known for their cooperative care of young, overlapping generations, and a distinct division of labor, are a significant concern for homeowners across the state. While they play an important role in natural ecosystems, termites pose a significant threat to homes and buildings, causing extensive damage. In this comprehensive guide, we’ll explore the lifecycle, habitat, and effective management strategies for termites in Nebraska.

Understanding Termites: Life Cycle and Habitat

Before delving into termite management strategies, it’s essential to understand these insects better. Let’s start by looking at their lifecycle and habitat.

Lifecycle of Termites

Termites, much like other insects, have a lifecycle that begins from an egg. The growth process entails several stages, including the larval, nymph, and adult stages, which are crucial for the colony’s growth and expansion.

1. The Egg Stage

The queen termite lays eggs, marking the beginning of the termite lifecycle. These eggs are tiny, transparent, and jelly-like.

2. The Larval Stage

The eggs hatch after a few weeks, giving rise to larvae. These larvae are immature termites that need to be fed and groomed by worker termites to grow and develop.

3. The Nymph Stage

The larvae then transform into nymphs, an intermediary stage before reaching adulthood. During this stage, they begin to differentiate into various roles/castes within the colony.

4. The Adult Stage

The nymphs eventually mature into adults, taking on one of the three main roles within the termite colony: workers, soldiers, or alates (reproductives). Workers are responsible for foraging for food and maintaining the nest, while soldiers defend the colony against predators. Alates, also known as swarmers, are winged termites that leave the nest to start new colonies.

Habitat of Termites in Nebraska

In Nebraska, the subterranean termite is the most common species. As their name suggests, these termites live in the soil and build extensive tunnel systems to reach their food sources. Their colonies are decentralized and often located near a food source.

Termites need moisture to survive. In their natural habitat, they break down cellulose material such as decaying plant matter, decomposing trees, and leaf litter. But in urban areas, they become a problem due to our use of wood products in construction.

In Nebraska, termite swarms usually occur in the spring, from March to May, often after significant rainfall. However, they can remain active and continue to feed year-round in heated buildings.


Identifying Termite Infestations

Identifying a termite infestation early can save homeowners thousands of dollars in repair costs. However, due to their cryptic nature, termite infestations can often go unnoticed until significant damage has been done. Here are some signs to watch out for:

1. Swarmers

One of the most visible signs of a termite infestation is the presence of swarmers. These are mature termites that have wings and leave the nest to start new colonies. They are often mistaken for winged ants, but there are key differences. For instance, termites have straight, bead-like antennae and a broad waist with no distinction between the thorax and abdomen.

2. Discarded Wings

After swarmers have found a mate and a suitable place to start a new colony, they shed their wings. These discarded wings can often be found near windowsills or caught in cobwebs.

3. Mud Tubes

Subterranean termites build mud tubes to travel between their nest in the soil and their food source. These tubes are often located near the foundation of a building.

4. Damaged Wood

Termites feed on the cellulose found in wood, leaving behind a series of tunnels and galleries. This can cause the wood to sound hollow when tapped and may result in sagging floors and ceilings.

Managing Termites in Nebraska

Managing termites effectively involves a combination of preventative measures and control strategies. Here’s how homeowners in Nebraska can protect their homes from these destructive pests.

1. Regular Inspections

Regular inspections are crucial in preventing termite infestations. Look for signs of termites, such as discarded wings, mud tubes, and damaged wood. If you suspect an infestation, it’s best to contact a pest control professional for a comprehensive inspection.

2. Reduce Moisture

Since termites thrive in moist environments, it’s essential to ensure that your home doesn’t provide the ideal conditions for them to thrive. Regularly check for and fix any leaks, ensure proper ventilation in your home, and keep gutters clean to prevent water accumulation.

3. Maintain a Termite-Free Zone

Create a termite-free zone around your home by ensuring that there is no wood-to-soil contact. This includes not storing firewood against your home and keeping shrubs trimmed away from the building.

4. Professional Pest Control

Professional pest control companies, such as Recon Pest Services, offer comprehensive solutions for managing termites in Nebraska. They use a variety of treatment options, including soil treatments and baiting systems, to eliminate termite colonies and prevent future infestations.

When to Seek Professional Help

While prevention is the best strategy against termites, sometimes professional help is needed for an established infestation. If you’ve noticed signs of termites in your home, it’s best to reach out to a reputable pest control company. They have the expertise and tools necessary to effectively handle termite infestations.

For residents of Omaha and Lincoln, Recon Pest Services provides reliable, effective, and safe termite management solutions. They can help identify the extent of the infestation, recommend the best course of action, and provide a free quote for their services.

Conclusion

Termites in Nebraska can cause significant damage to homes and buildings if not managed effectively. As homeowners, it’s crucial to understand these pests, know how to identify signs of an infestation, and take appropriate preventative measures. Regular inspections, reducing moisture in and around the home, maintaining a termite-free zone, and seeking professional help when needed can go a long way in managing termites effectively. Remember, the cost of prevention is always less than the cost of repair. Stay vigilant, and keep your home termite-free!

Recon CTAs 1200x200 Termites

Protect Your Home: A Comprehensive Guide to Pet Safe Roach Killers

Pet Safe Roach Killer

Dealing with roaches in your home can be a daunting task, especially when you’re a pet owner. You’re likely to worry about the safety of your furry friends while trying to eliminate these pesky insects. This is where pet safe roach killers come in. These products are designed to kill roaches while posing minimal risk to your pets. They are made with ingredients that, while lethal to pests, are generally safe for animals.

But what makes a roach killer pet safe? It all boils down to the ingredients and how they affect different organisms. Traditional roach killers often contain chemicals that are toxic to both roaches and pets. Pet safe versions, on the other hand, incorporate elements that selectively target pests without causing harm to mammals.

It’s essential to note that ‘pet safe’ doesn’t necessarily mean ‘pet proof.’ You should still exercise caution while using these products, ensuring they are out of your pet’s reach. Misuse can still lead to accidents, so always follow the manufacturer’s instructions.

Risks of Traditional Roach Killers to Pets

Traditional roach killers can pose significant risks to pets. These products usually contain potent chemicals designed to kill roaches swiftly. While effective, they can also be harmful to your pets if ingested or inhaled. Some common symptoms of poisoning include vomiting, diarrhea, seizures, and in extreme cases, even death.

Additionally, pets are often attracted to the bait used in many roach killers. If your pet ingests this bait, they may also ingest the toxic chemicals. Even mere contact with these chemicals can lead to skin irritation or burns.

The risks aren’t just physical. Exposure to harmful chemicals can also lead to behavioral changes in pets. They might become lethargic, anxious, or show signs of distress. Therefore, it’s crucial to opt for a safer alternative that ensures the wellbeing of your pets while effectively dealing with the roach problem.

Understanding Pet Safe Roach Killers

Pet safe roach killers work on the principle of targeted toxicity. They contain ingredients harmful to roaches but are typically safe for pets. Some use natural ingredients like diatomaceous earth, which kills roaches by dehydrating them. Others might use specific insecticides that affect the nervous system of roaches but are harmless to mammals.

It’s important to remember that while these products are safer, they still need to be used responsibly. Keep them out of reach from your pets, especially if they’re curious or love to explore. And always wash your hands after handling these products to avoid accidental ingestion or contact with your pet.

Benefits of Using Pet Safe Roach Killers

The primary benefit of using pet safe roach killers is, of course, their safety for your pets. They allow you to maintain a roach-free home without risking the health of your furry friends. This peace of mind is invaluable, especially when dealing with persistent pests.

Moreover, many pet safe roach killers are also environmentally friendly. They use natural or biodegradable ingredients that are less likely to pollute the environment. This makes them a great option if you’re looking to reduce your ecological footprint.

Lastly, pet safe roach killers are often just as effective as their traditional counterparts. They might work a bit slower, but they’ll get the job done without endangering your pets.

Top Pet Safe Roach Killers in the Market

Several pet safe roach killers are currently available in the market, each with its unique features and benefits. Some top picks include the EcoRaider Roach Killer, which uses natural ingredients to kill roaches on contact, and the Combat Max Roach Killing Gel, a pet safe bait that roaches carry back to their nest.

Another great option is the Advion Cockroach Gel Bait. While it uses a synthetic insecticide, it’s safe for pets when used as directed. Lastly, the Harris Roach Tablets use boric acid, a naturally occurring substance that’s lethal to roaches but generally safe for pets.

How to Use Pet Safe Roach Killers Effectively

Using a pet safe roach killer effectively involves more than just applying it in your home. Start by identifying the areas where roaches are most active. These are often dark, damp spaces like under the sink or behind appliances. Apply the roach killer in these areas for maximum effectiveness.

Next, remember to reapply the product as directed by the manufacturer. Some products may require reapplication every few days, while others might last for weeks. Also, ensure you’re using enough of the product. Too little might not kill the roaches, while too much could be wasteful and potentially harmful.


DIY Pet Safe Roach Killers: Recipes and Tips

If you prefer a DIY approach, there are several pet safe roach killer recipes you can try. One popular option is a mixture of equal parts baking soda and sugar. The sugar attracts the roaches, while the baking soda kills them.

Another effective recipe involves mixing equal parts boric acid and flour, then adding enough water to make a dough. Roll this into small balls and place them where you’ve seen roaches. Boric acid is toxic to roaches but generally safe for pets.

Remember, even homemade roach killers should be used responsibly. Keep them out of your pet’s reach and wash your hands after handling them.

Where to Buy Pet Safe Roach Killers

Pet safe roach killers are widely available and can be purchased from various sources. Most home improvement stores carry a selection of these products. You can also find them at pet stores in the pet safety section.

Online shopping platforms like Amazon offer a wide variety of options, often at competitive prices. When shopping online, remember to read reviews and compare products to ensure you’re getting the best deal for your needs.

Conclusion: Safeguarding Your Home and Pets Against Roaches

Protecting your home from roaches doesn’t have to come at the expense of your pet’s safety. With pet safe roach killers, you can effectively handle a roach infestation while keeping your furry friends safe. Remember to use these products responsibly and always prioritize your pet’s safety.

For the best pest management solutions in Omaha and Lincoln, contact Recon Pest Services for a free quote. With their expertise and commitment to safety, you can rest easy knowing your home and pets are in good hands.

Recon CTAs 1200x200 Roaches

Naturally Repel Termites with Orange Oil: A Sustainable Solution

Termites with orange oil

Termites are tiny insects that can cause significant damage to our homes and properties. These pests feed on wood and other cellulose materials, making them a homeowner’s nightmare. They can quickly infest a structure and cause structural damage that can be expensive to repair. Termites are often referred to as “silent destroyers” because they can go undetected for long periods, causing extensive damage before being discovered.

What is orange oil and how does it repel termites?

Orange oil, also known as d-limonene, is a natural oil extracted from orange peels. It is an effective and eco-friendly solution for termite control. The oil contains a compound called d-limonene, which is toxic to termites. When applied to infested areas, orange oil penetrates the termite’s exoskeleton, causing it to suffocate and die. The oil also disrupts the termite’s pheromone trails, making it difficult for them to communicate and navigate. Orange oil is a powerful repellent, driving termites away from treated areas and preventing further damage.

Benefits of using orange oil for termite control

Using orange oil for termite control offers numerous benefits. Firstly, it is a natural and environmentally friendly alternative to traditional chemical treatments. Unlike conventional pesticides, orange oil does not leave harmful residues in the soil or air. It is safe to use around humans, pets, and plants, making it a preferred choice for those seeking sustainable pest management solutions.

Secondly, orange oil is highly effective in targeting termites. It can penetrate deep into the wood, reaching the hidden galleries where termites reside. The oil’s ability to suffocate termites and disrupt their trails makes it an efficient method of eliminating infestations. Orange oil also acts as a deterrent, preventing termites from returning to treated areas.

Lastly, orange oil is easy to use and apply. It can be sprayed directly onto infested areas or injected into termite galleries. The oil’s low toxicity and pleasant citrus scent make it a user-friendly option for homeowners. Regular application of orange oil can help prevent termite infestations and protect your property from further damage.

How to use orange oil for termite treatment

Using orange oil for termite treatment is a straightforward process that can be done by homeowners. Here’s a step-by-step guide on how to effectively use orange oil:

  1. Identify the termite-infested areas: Inspect your property for signs of termite activity such as mud tubes, damaged wood, or discarded wings. Focus on areas where termites are most likely to nest, such as crawl spaces, basements, and attics.

  2. Prepare the orange oil solution: Dilute the orange oil with water according to the manufacturer’s instructions. Typically, a 1:1 ratio is recommended. Mix the solution well in a spray bottle or a tank sprayer.

  3. Apply the orange oil: Spray the diluted orange oil directly onto the termite-infested areas. Ensure thorough coverage, especially in areas where termites are actively feeding or have established colonies. For hard-to-reach termite galleries, consider injecting the orange oil using a syringe or a specially designed applicator.

  4. Monitor and reapply as needed: Regularly inspect treated areas for any signs of termite activity. If necessary, reapply the orange oil solution to ensure continued protection against termites.

Remember, while orange oil can be effective in treating minor termite infestations, it may not be suitable for severe or widespread infestations. In such cases, it is advisable to consult a professional pest control service for comprehensive termite treatment.

Effectiveness of orange oil compared to traditional termite treatments

Orange oil has proven to be an effective alternative to traditional termite treatments. When used correctly, orange oil can eliminate termites and prevent further infestations. However, it is essential to note that its effectiveness may vary depending on the extent of the infestation and the species of termites present.

Compared to traditional chemical treatments, orange oil offers several advantages. It is a natural product that poses minimal risk to human health and the environment. Unlike conventional pesticides, orange oil does not require extensive safety precautions during application. It also does not leave behind harmful residues that can contaminate soil or water sources.

However, it is important to acknowledge that orange oil may not provide the same level of long-term protection as some traditional treatments. While it can effectively kill termites on contact, it may not offer the same residual protection against future infestations. Regular monitoring and reapplication may be necessary to maintain termite-free conditions.

Safety considerations when using orange oil

While orange oil is generally safe to use, it is essential to follow proper safety precautions to ensure your well-being and the effectiveness of the treatment. Here are some safety considerations when using orange oil for termite control:

  1. Wear protective clothing: When handling orange oil, wear gloves, safety goggles, and a mask to prevent direct contact with the oil and inhalation of its vapors.

  2. Ventilate the area: Ensure proper ventilation when applying orange oil indoors. Open windows and doors to allow fresh air circulation. If possible, use fans to increase airflow and reduce the concentration of fumes.

  3. Keep away from open flames: Orange oil is flammable, so keep it away from open flames, sparks, or heat sources. Do not smoke while applying the oil.

  4. Store safely: Store orange oil in a cool, dry place away from children and pets. Follow the manufacturer’s instructions for proper storage and disposal.

By following these safety guidelines, you can effectively use orange oil for termite control while minimizing any potential risks.

Sustainable advantages of using orange oil for termite control

Choosing orange oil for termite control offers several sustainable advantages. Firstly, orange oil is derived from a renewable resource – orange peels. By utilizing this natural byproduct, we reduce our reliance on synthetic chemicals and promote a more sustainable approach to pest management.

Secondly, orange oil is biodegradable, meaning it breaks down easily in the environment without causing long-term harm. Unlike traditional chemical treatments that can persist in the soil and water, orange oil rapidly decomposes, minimizing its impact on ecosystems.

Lastly, orange oil promotes a healthier indoor environment. Unlike chemical pesticides, orange oil does not release harmful fumes or residues that can contaminate the air we breathe. By choosing orange oil, we can create a safer and more sustainable living space for ourselves and our loved ones.

Conclusion: Embracing sustainable solutions for termite control

Termites can cause significant damage to our homes and properties if left unchecked. By embracing sustainable solutions like orange oil for termite control, we can effectively eliminate termites while minimizing our impact on the environment. Orange oil offers a natural and eco-friendly alternative to traditional chemical treatments, providing effective termite control without the harmful side effects.

Remember, while orange oil can be a powerful tool in the fight against termites, it may not be suitable for severe infestations. In such cases, it is best to consult a professional pest control service for comprehensive treatment options.

For the best pest management solutions in Omaha and Lincoln, contact Recon Pest Services for a free quote. Let’s work together to protect our homes and embrace sustainable solutions for termite control.

Recon CTAs 1200x200 Termites

×